
The night before your first academic conference presentation, sleep is the last thing that comes. You run through slides in your head and wonder what happens if someone asks a question you cannot answer. That worry is almost universal, and a clear plan takes most of it away.
Quick answer: To present at an academic conference, submit a focused abstract, plan a talk that fits your slot with a few minutes to spare, build simple slides, rehearse aloud with a timer, and prepare for questions. For a 15-minute slot, plan about 12 to 13 minutes of speaking. Always follow the time limit, format and file rules in your acceptance email.
This guide follows the order of the work: abstract, structure, slides, rehearsal, conference day, questions, online delivery and what to do afterwards.
What Is an Academic Conference Presentation and Why Is It Different?
An academic conference presentation is a short, formal talk or poster in which you share original research with specialists in your field. It is not a lecture, a thesis defence or a business report, and treating it like one is a quick way to lose the room.
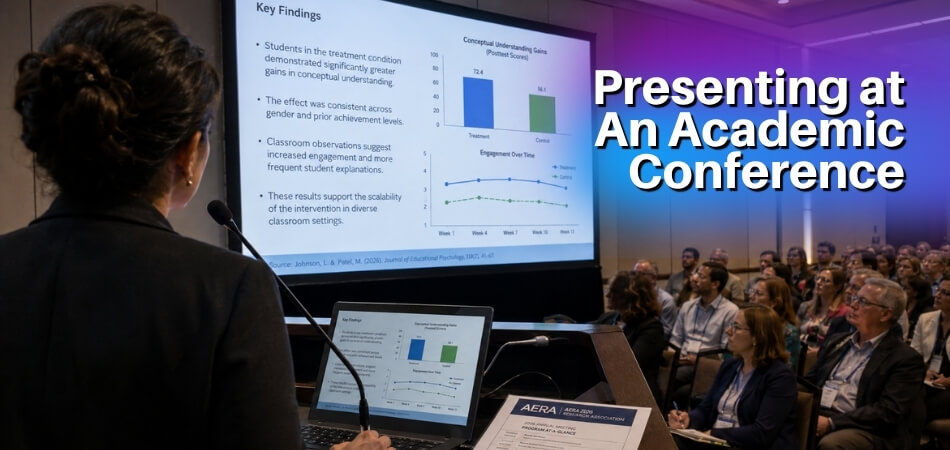
The audience is the first difference. Attendees know the literature, they will spot a shaky methodology claim quickly, and they ask pointed questions that a general audience never would. They are not there for the basics. They want to see what is new, what is contested and what your work opens up.
The format is also compressed. A 15-minute talk leaves no room to define every term, walk through every analysis step or summarise the whole literature review. A 20 to 30 minute slot gives more breathing room, but the same discipline applies: choosing what to leave out is the skill that separates a good talk from a forgettable one. Submitted work usually gets the shorter slots, because contributed talks run shorter than invited talks.
Finally, a conference is not a journal. You present work that may still be evolving, to people who could become collaborators, critics or future hiring committees. How you present matters almost as much as what you present.
Formats vary: an oral presentation, a poster session, a 5-minute flash talk, or an online or hybrid slot. Each has its own conventions, covered below. Field norms such as citation style, discussant roles or code demos differ by discipline; this article covers what applies everywhere. Presenting at an education conference, for example, adds consent and privacy checks before you show student work or classroom photos.
Step 1: Write a Strong Abstract
The abstract is your foot in the door, and it also fixes what you have promised to deliver. It is easy to write it, forget it, and then build slides without re-reading it. Re-read it before you start.
What to Include in Your Abstract and How to Write It
Word limits vary by event (often a few hundred words), so read the call for papers carefully. Organisers can reject submissions that ignore the word limit, headings or anonymisation rules.
A solid abstract does four things:
- States the problem or research question. Be specific. “This paper examines climate policy” tells a reviewer almost nothing. “This paper analyses why carbon pricing legislation fails in federal systems with strong subnational veto players” shows exactly where you sit in the literature.
- Explains your method. Qualitative, quantitative, mixed, archival or experimental. Reviewers want to know how you are doing the work.
- Summarises your findings or argument. Do not tease. An abstract that promises findings but never states them reads as evasive.
- Signals the contribution. Why does it matter to the field? One or two sentences.
Write the abstract after you have drafted the paper or outlined the argument in full. Writing it first usually produces vague language. Check the conference style guide for tense: many expect present tense for arguments (“this paper argues”) and past tense for completed empirical work (“the analysis revealed”).
If the conference uses blind review, remove anything that identifies you, such as your institution, your earlier publications or phrases like “building on my earlier work.” If earlier programmes are online, read three or four accepted abstracts from the same conference to see the register and depth reviewers expect.
Oral Presentation or Poster Session: Which One Should You Choose?
Some conferences let you state a preference; others assign the format by topic fit, available slots or reviewer scores. If you have a choice, do not default to oral just because it sounds more prestigious.
| Format | Best for | Watch out for |
|---|---|---|
| Oral presentation | A clear linear argument, new empirical findings, or a theoretical claim that benefits from explanation and questions | A half-finished argument is harder to recover from on stage |
| Poster session | Exploratory or early-stage work, complex studies where you want to walk someone through a figure, and detailed one-to-one feedback | Online posters can translate awkwardly; check how the event runs them |
A few honest considerations. A graduate student presenting for the first time may find a poster removes the pressure of formal delivery and gives one-on-one practice. If your goal is visibility, an oral slot in a well-attended session does that more efficiently. And if the work is unfinished, a poster lets the gaps become discussion points instead of problems.
Step 2: Build Your Presentation Structure
Structure is where a talk can fail before the speaker says a word. With brilliant research, clear slides and confident delivery, a wrong shape still makes the audience lose the thread halfway through.
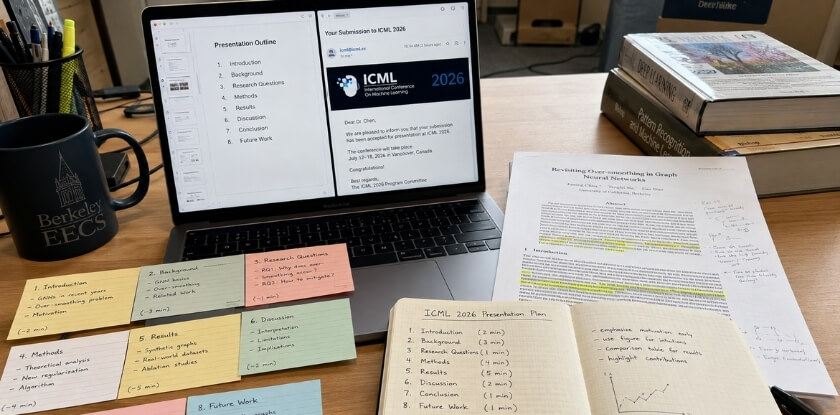
Academic talks do not need a creative structure. Predictability helps the audience follow you.
The Ideal Structure for a 15-Minute Talk
Aim to speak for 12 to 13 minutes. The remaining two or three minutes are a buffer for the slide that will not advance or the moment your mind goes blank. Planning 15 minutes of content for a 15-minute slot is planning to overrun.
| Part | 15-minute slot | 20-minute slot | What goes in it |
|---|---|---|---|
| Opening hook | 1 min | 1 min | Start with the problem in one sentence, then introduce yourself |
| Background and motivation | 2 min | 3 min | One to three key studies, the gap, your research question |
| Methods | 2 min | 3 min | Enough for the audience to trust the findings; point to the paper for the rest |
| Results | 4 to 5 min | 6 min | The heart of the talk; one finding at a time |
| Discussion and implications | 2 min | 3 min | What it means, one honest limitation, and what the field should do differently |
| Conclusion | 1 min | 1 min | One slide, three bullets at most; restate the question and answer it |
| Total | 12 to 13 min | about 17 min | The rest of the slot is your buffer |
A few notes on the table:
- Hook. Do not begin with “So, my name is…” and a title slide. Open with the problem, then introduce yourself.
- Background. Be brutal with cuts. You cannot fit your whole literature review into 15 minutes.
- Terms. Define only the one or two terms your argument depends on. Sessions can mix specialists with students and people from neighbouring fields, and a 2022 LSE student conference guide advises explaining complex terms in plain language without talking down to anyone.
- Results. Do not crowd four findings onto one slide and race through them.
As a rough ceiling, use one slide per minute: about 12 to 13 slides for the 15-minute plan above.
Adjusting Your Structure for a 20 to 30 Minute Talk
More time means more breathing room for the same content, not more content. The core structure stays identical; pacing and depth change. At 30 minutes, results and discussion can expand: you can walk through sub-findings individually and address alternative interpretations.
A Q&A block of around 10 minutes is sometimes added at the end, so confirm with your session chair whether Q&A is inside the slot. One published example is the University of Cambridge Faculty of Philosophy’s chair guidance for its Open Sessions (page read October 2026): each 30-minute slot is up to 20 minutes for the presentation, 8 minutes for Q&A and 2 minutes for handover. If your 30-minute slot includes questions, you are really delivering a 20-minute talk, so build it that way. For slides, stay at or below about 17 for the 20-minute plan above and no more than about 25 for a full 30-minute talk. Beyond that you are rushing or padding.
A Separate Structure for Poster Sessions
A poster is not a short talk with a visual aid. It is a conversation, and the poster is the backdrop. Visitors walk past, glance, and stop only if something catches them. You may have only a moment before they drift away unless you pull them in with a clear spoken summary.
The poster has to work on two levels: as a standalone document someone can read without you, and as a backdrop for your explanation. A reliable layout:
- Title and authors: top centre, large enough to read from a few metres away
- Introduction or problem statement: top left, brief
- Methods: middle left or centre; one clean diagram beats three paragraphs
- Results: centre and right, your largest section
- Conclusions: bottom right
- Contact details or QR code: bottom corner, pointing to your paper, data or a fuller deck
Keep text minimal; as a rule of thumb, aim for around fifty words per section and cut any paragraph by half. Practise a 90-second walkthrough you can deliver on autopilot, plus a longer 3 to 5 minute version for people who are genuinely interested. Stay at your poster for the whole display period, and tell the organisers in advance if you cannot attend rather than leaving an empty space; a May 2026 EGU blog post by Martin Radenz raised unattended and withdrawn posters as a problem at that meeting. Questions arrive mid-conversation rather than from raised hands, which most researchers find easier, but know your methods cold and keep your data on your phone in case someone asks about a figure that is not on the poster.
Step 3: Create Your Slides (PowerPoint, Beamer, Google Slides)
Your slides are not your presentation. They are a visual aid for it, and mixing the two up is one of the quickest ways to lose an audience that was with you.
Core Rules of Effective Slide Design
- One idea per slide. Squeezing three points onto one slide because you fear running long hides a pacing problem instead of fixing it.
- Minimal text. A bullet should be a cue, not a sentence. A full paragraph gives the audience a reading task, and they stop listening.
- Readable size. As a rule of thumb, keep body text around 24pt or larger. Rooms vary in size, so do not assume everyone sits close.
- High contrast. Dark text on white or white on dark both work. Light grey on slightly lighter grey does not. Colours that look sharp on your laptop can wash out under room lighting, so test on a projector or large screen if you can.
- Space for figures. A graph worth including should be readable without squinting, with clear axis labels and an obvious takeaway.
- Purposeful animation. A simple fade that reveals a complex diagram piece by piece can help if you say aloud what is appearing. Slides that fly in from every direction only slow things down.
Tool Selection: PowerPoint, Beamer or Google Slides
| Tool | Best when | Main risk |
|---|---|---|
| PowerPoint | You want flexible design and the widest support; organisers almost always accept .pptx files | The room computer may have a different version and shift your layout, so bring a PDF backup |
| Beamer (LaTeX) | Your talk is equation-heavy or you already write in LaTeX; it produces portable PDFs with no font substitution | Layouts are rigid and customising beyond built-in themes takes effort |
| Google Slides | You are co-authoring the deck or sharing your screen remotely and want no file transfer | Needs an internet connection and offers fewer design options; risky if venue Wi-Fi is unreliable |
Beamer is common in mathematics, statistics, physics and computer science, but do not use it just because your field traditionally does. If the talk is not equation-heavy, there is no compelling reason. Use whatever tool you know well enough that it disappears; a polished talk in basic PowerPoint beats an impressive Beamer deck you are visibly wrestling with.
Common Slide Mistakes to Avoid
Reading from your slides. The audience reads faster than you speak, then waits for you to finish. Slides and speech should complement each other, not duplicate each other.
Too many slides for the slot. Thirty slides in 15 minutes averages 30 seconds a slide. You will rush, skip slides mid-talk, and it will show.
Inconsistent formatting. Mixed fonts, random colours and uneven headers signal a rushed job. Spend 20 minutes setting up one template and stick to it.
Low-resolution images. A pixelated graph looks careless even when the research is strong. Export figures at around 300 dpi or use vector formats where possible.
A cluttered title slide. Your name, institution, conference name and date are enough. Well-known keynote speakers can get away with sparse title slides because everyone knows them. You probably cannot yet.
Overcrowded acknowledgements. One slide at the end: co-authors, funding source, maybe one collaborating institution. A wall of logos nobody can read before you move on serves no one.
No slide numbers. During questions someone will say “on the slide with the regression table,” and without numbers finding it becomes awkward.
Making Your Slides and Talk Accessible
Accessible slides help listeners with low vision, hearing loss or colour-vision differences, and anyone sitting at the back of a full room. The SIGACCESS Accessible Presentation Guide (Kyle Rector, University of Iowa, 2019) gives these main points:
- Use high contrast that works in dim and bright rooms, and do not rely on colour alone to show emphasis; bold or italics also work.
- Use large sans serif fonts and keep text brief.
- Keep graphics simple, and give a text equivalent for any graphic that carries information.
- Describe images aloud, and avoid using a pointer.
- Describe and caption any video, and avoid animations unless you describe them.
- Make your slides available before the talk, ideally the previous day or a week ahead.
- Speak clearly, face the audience and avoid slang.
Step 4: Practice and Rehearsal
Rehearsal is the part that is easiest to skip or half do, and skipping it is how a talk falls apart on the day. It is not running your eyes over your notes the night before. It turns a written script into natural delivery.
How Many Times to Practise and How to Do It Right
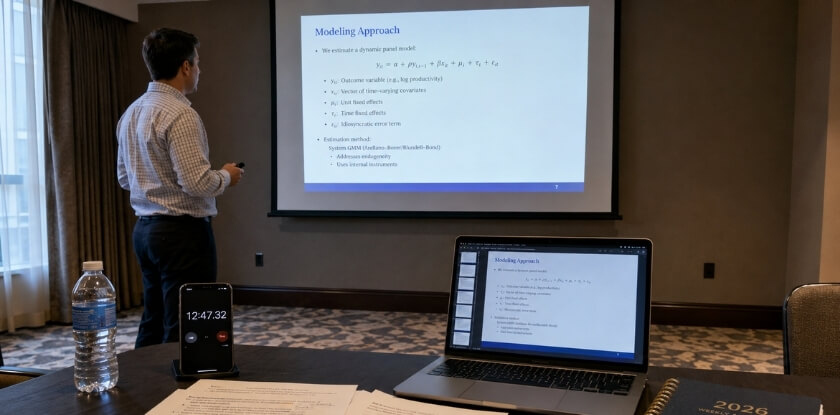
Three full run-throughs is a sensible minimum, and doing five or more is fine if you need them. Reading slides quietly at your desk does not count. Speak aloud at full volume, as you would in the room, so your mouth learns the words and not just your brain.
- Runs 1 and 2: discovery. Do not aim for perfect. Find where your explanation breaks down, where a transition stumbles and where a slide does not match what you are saying.
- Run 3: timed. Use a stopwatch and record the actual time. Your time should match the plan from Step 2. Conferences cut speakers off, and running long loses the audience and annoys the chair.
- Runs 4 and 5: polish. Focus on pace, pauses and phrasing: slow down on your key finding, pause before a critical point, vary your tone so you are not monotone by minute eight.
Practise in front of someone at least once, such as a colleague, a labmate or a friend outside your field. Performing for another person is different from rehearsing alone, and they will show you where you assume too much knowledge. If nobody is available, record yourself on your phone and watch it back. It is uncomfortable. Do it anyway.
Do not memorise word for word. If you blank mid-sentence there is no recovery. Know the structure cold, what each slide does and in what order, and practise talking around it. Bullet-point cue cards are fine; a fully scripted printout is risky.
Rehearse standing up. Breathing, posture and projection are all different on your feet. If you can get into the actual room before your session, even for ten minutes, stand at the front and check where the screen is, where you will stand and whether you will use a clicker or the keyboard. Rehearsal tips for online delivery are in the online section below.
Step 5: Deliver on Conference Day
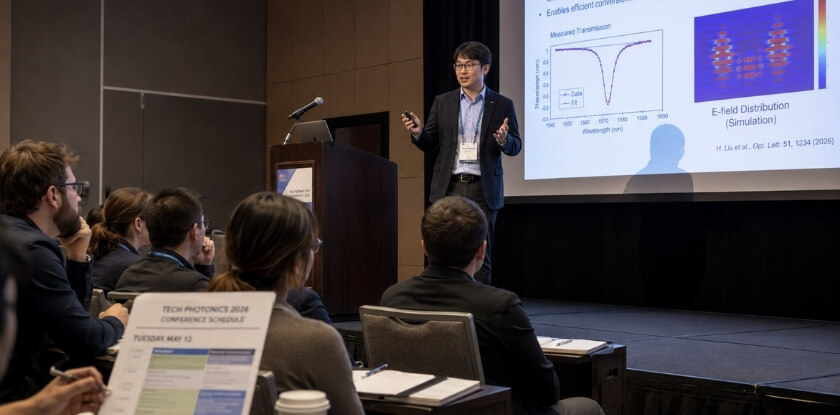
On the day, the opening and your pace matter most. Arrive early (30 minutes before your session is a sensible target unless the organiser says otherwise) to load slides, test the clicker and microphone, and find the water. Technical problems are common, and buffer time absorbs them.
How to Open Strong: The First 2 Minutes
The first two minutes tell the room whether you know your material. Do not waste them reading the title slide aloud or saying “So, um, today I’m going to be talking about…” Start with something that lands: a sharp question, one striking number, or a sentence on why the research matters now.
“We have measured [variable] the same way for [number] years, and I want to show you why that is a problem.”
Then introduce yourself in two sentences: name, institution, project. Nobody needs your CV. State your main argument or research question in plain language. Know your opening cold, even if you have to memorise it, because looking at the screen in the first thirty seconds loses the connection you were just building.
Body Delivery: Voice, Pace, Eye Contact and Body Language
Pace. Nervous speakers speed up without noticing. Measure your own rate in rehearsal. If a timed run comes in well under your plan, you are probably rushing. Pauses feel more awkward to you than to the audience.
Voice. Speak to the back row, not the laptop in front of you. Dropping your pitch slightly on a key point sounds confident rather than anxious.
Eye contact. In a large room, pick three or four spots across it and rotate between them, holding each for a few seconds. Do not scan like a security camera. In a small room, talk to the people. Online, look at the camera.
Body language is mostly about what you do not do. Do not sway, grip the podium or leave your hands in your pockets. Stand straight and let your hands move naturally. Hold a clicker loosely.
Nerves. A few slow exhales backstage or outside the room settle your breathing. It sounds too simple, and it helps.
If You Are Running Out of Time
Agree with the session chair before your session how time will be signalled, and check the clock at fixed points, for example when you reach your results. Do not count on extra minutes: the Cambridge Faculty of Philosophy chair guidance mentioned above says chairs should feel obliged to cut off speakers who run over time. Editage’s guide (revised May 2026) suggests keeping a short outline of the talk ready in case your time is cut, and extra material in case you get more. If you are behind, jump to your key result and conclusion slides rather than speeding through everything.
How to Learn from Keynote Speakers During the Conference
Do not treat the keynote as downtime. Keynote speakers have usually presented their work many times and refined what connects with a specialist audience. Watch how they open, whether with a story, a problem or a data point, and how long they spend on background before reaching the argument. Notice their slides: few words, high-quality figures and consistent type are the result of iteration, so compare them honestly with yours.
Watch how they handle questions too: whether they repeat the question, say “I don’t know” when they do not, and redirect off-topic comments politely. Jot down a phrase or structural choice that struck you and glance at it before your own slot.
Step 6: Handle the Q&A Session
How you handle an unexpected question can matter as much as the talk itself. Slot lengths and Q&A rules differ between events, so check yours in the programme or with the chair.
How to Prepare for Q&A in Advance
- Find your weak points. Where did you make an assumption you did not fully justify? Questions will come from exactly those spots. Write them down.
- Get a practice grilling. Ask a colleague to read your abstract or watch a rehearsal and throw questions at you. Working alone, read published critiques of similar papers; weaknesses in a topic area tend to overlap.
- Keep extras in reserve. Hold three things you could not fit into the talk. They make good extended answers without bloating your slides.
- Add backup slides. Park one or two after your final slide: methodology details, supplementary data or alternative analyses. Do not mention them during the talk. If a question fits, click to the slide, walk through it in 30 seconds and click back.
- Expect counterarguments. Not to rehearse a defensive answer, but so you are not caught flat-footed. Audiences are testing the thinking, not attacking you. If your design has a limitation, own it briefly and say what it does not affect.
- Know the mechanics. At online events, find out whether questions come through a chat queue, a moderator reading them aloud or open microphones.
How to Answer Difficult or Unknown Questions
It is fine not to know. A clean “I don’t know” beats guessing aloud in front of the keynote speaker and half your field. If you do offer a guess, say first that you do not really know. You can also admit the gap and then answer a nearby question you can answer. Two honest options:
“That’s outside the scope of what I’ve looked at so far, but it would be a natural next step.”
“I’d want to check that before giving you a confident answer. Could we talk after the session?”
For difficult but answerable questions, pause for a few seconds. It looks like thinking, not confusion; David Pannell of the University of Western Australia (2011) says even 5 to 10 seconds is acceptable. Let the questioner finish before you answer, and keep the answer short. If a question is unclear or long, paraphrase it back: “So you’re asking whether the effect holds when we control for [X]. Is that right?” This confirms you understood, buys a few seconds and helps listeners who did not follow it.
Some questioners are really making a comment or pushing a competing interpretation. You do not have to fully engage:
“That’s an interesting angle. My data doesn’t directly address it, but I’d be happy to discuss it afterwards.”
During questions, stay open: no crossed arms, eyes down or stepping back. Look at the person asking, then widen your gaze to the room as you answer, because you are answering everyone. Adrenaline can make you speak faster, so bring your pace down deliberately.
If the room goes quiet, Editage’s guide (revised May 2026) suggests prompting discussion by pointing out a weakness in your own paper, and not worrying if no questions come after a few prompts. A question you pose yourself can also restart the room.
Presenting at Online and Hybrid Conferences (Zoom and Other Platforms)
Remote presenting needs deliberate adjustment, because eye contact, movement and reading the room do not carry over to a screen. This section applies to events that run online or in hybrid format, so check your event’s format first.
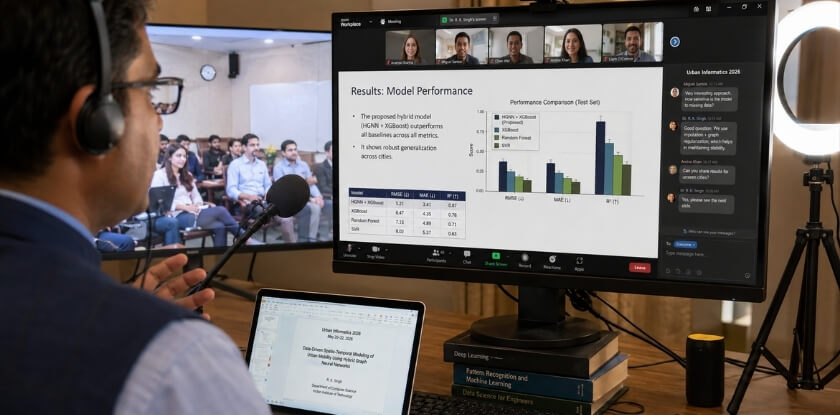
The Core Technical Setup
A bad connection or muffled audio undermines a well-prepared talk faster than any content problem. At minimum you need:
- A wired connection or a strong, stable Wi-Fi signal. Do not rely on hotel Wi-Fi on the day.
- An external microphone or headset. A laptop’s built-in mic picks up room noise and sounds flat; even a basic USB mic or headset helps.
- Headphones, especially in hybrid setups, to avoid feedback.
- Light in front of your face, not behind you.
Close every application you do not need. Screen sharing can capture notification pop-ups from email or chat, which is embarrassing mid-talk. Rehearse in the same space, at the same desk, with the same camera angle you will use. Do a separate dry run of screen sharing, and find out what happens to your slide notes when you share, since some setups hide them and others do not. Do this the day before, not five minutes before.
Camera Placement and Eye Contact
Looking at your slides or at attendees’ faces makes you look down or sideways on camera. Put the camera at eye level (a stack of books under the laptop works) and look at the lens, not the screen. It feels unnatural at first. A small sticker or arrow next to the lens is a useful reminder.
At hybrid events the in-room and online audiences need different things at once. Alternate your attention: address the room, then turn deliberately toward the camera to include remote viewers.
Slide Design for Online Delivery
- Use somewhat larger fonts than you would in person. Text readable at the back of a room can be unreadable in a small video window.
- Avoid animations that rely on precise timing; lag between your audio and the shared screen makes them look glitchy.
- Use high-contrast colours, because light grey on white disappears on many monitors.
Test how your slides look when screen-shared at typical video call quality. Do an actual test share, not just a preview.
Running the Session on the Day
Log in early; about 15 minutes before your slot is a reasonable default, or earlier if the organiser asks. Check screen sharing, audio and the platform’s hand-raise and chat functions. On Zoom, the “Share Screen” and “Stop Share” buttons are not in the same place, so find them before you are live. Have your slides open and in presentation mode before the chair introduces you, and keep a glass of water close.
If something breaks, say so directly and stay calm: “I think my audio cut out. Can someone confirm they can hear me?” Audiences forgive technical problems when the presenter handles them without fuss.
Voice and Pace Online
Without body language doing any of the work, your voice carries everything. Speak a little slower than feels natural, because audio compression on video platforms flattens speech rhythm and pauses land differently. Vary your tone deliberately, since monotone is hard enough in a lecture hall and worse over a call. Mark moments in your notes where you want to slow down for a key point.
The Online Q&A Session
Online questions often arrive through chat, raised hands and sometimes audio, all at once. Ask the organiser how they want to handle it. If you manage it yourself, ask attendees to type questions as a backup, since audio questions are slow to start and a few seconds of silence after “any questions?” feel twice as long on a call. Ask a co-author or colleague to watch the chat, flag the best questions and filter duplicates.
Poster Sessions Online
Online posters are awkward. Platforms handle them with breakout rooms, short video slots or static images with a comment thread. If you get a short video slot (often a few minutes; check your instructions), treat it as a condensed oral talk: pick two or three findings, make those land, and leave time for questions. If it is an image with comments, put your contact details on the poster itself so interested people can reach you.
What to Do After Your Academic Conference Presentation
It is easy to walk off stage, feel relieved and do nothing. The days right after your talk are some of the most productive of the whole conference cycle.
Collect Your Notes While Everything Is Fresh
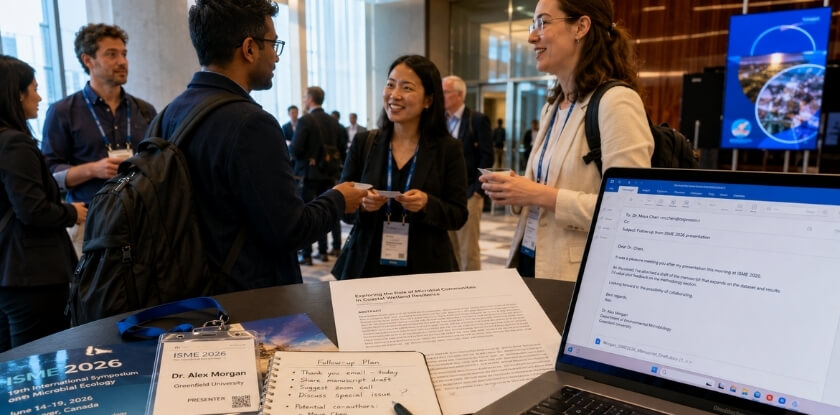
That same evening, write down every question from the Q&A, comments from the audience and informal feedback from the hallway. Memory fades fast after a full conference day. If someone pushed back on a methodology point or asked something you could not answer, note it; it is useful for revision.
Follow Up With People You Met
Email the people you exchanged details with (other presenters, audience members, maybe a keynote speaker) within a few days, while the conversation is fresh. Keep it short and refer to something specific you discussed so it does not read like a template. If you promised a paper, reference or slide deck, send it now.
Share Your Slides (Thoughtfully)
Posting slides is worth doing, but check that the figures, images and data tables are yours to share. If the work is under review or contains unpublished data you want to protect, post a trimmed version. Good places include your institutional profile, ResearchGate or a personal academic site; some conferences also collect slides centrally.
Reflect on the Presentation Itself
Be honest: did you run over, did a slide confuse people, did you lose the room anywhere? This is how you improve for the next talk. Keep a short running document of what worked and what you would change; a few bullets are enough.
Think About What Comes Next for the Research
Conference feedback often surfaces what peer reviewers will flag later. If several people asked the same clarifying question, your framing needs work in the written paper. Revise with the feedback in mind before you submit; if the paper is already published, file the comments for the next study.
Update Your CV
Add the presentation under conference papers or presentations, with the conference name, date, location (or “online”), and whether it was an oral presentation or a poster. Match the formatting style of your field. It takes three minutes and is easy to forget.
Stay in Touch With the Community
One conference appearance, handled well, can open longer conversations. Follow the work of people on adjacent problems and engage with it. Academic careers are built partly on relationships that start with a chat after a poster or a shared interest spotted in someone else’s talk.
From our experience at MS International: For most applicants, the route to our in-person conferences in the Greater Toronto Area is the presenting-author track: submit work for review and register after acceptance. Review is double-blind, decisions normally take about 10 working days (complex submissions or revisions may take longer), and full papers normally run four to twelve pages in APA style. Work must not be published or under review elsewhere, and accepted papers may be considered for proceedings where applicable. Keynote and invited roles are arranged separately with the organizing team and are not obtained by buying an author ticket. Speakers cover their own travel, accommodation, visa, transportation and personal expenses, and speaking creates no entitlement to an honorarium, speaker fee or travel reimbursement unless MS International has agreed otherwise in writing. A moderator introduces each speaker, and speakers receive a certificate after presenting. Presentation lengths may vary, so your speaker confirmation and the final programme are the official sources for your slot.
FAQ: Presenting at an Academic Conference
Once your abstract is accepted, practical doubts start to pile up: talk length, slides for a 15-minute slot, presenting from notes, running short of time and a room that stays silent.
How long should an academic conference presentation be?
Whatever your acceptance email says. Many events use a 15-minute talk or a 20 to 30 minute slot, and some include questions inside that time. If the limit is not stated, email the organiser before you build anything.
Do I need to submit slides in advance?
Sometimes. Larger events and online or hybrid events may ask for slides before the session so the technical team can load them. Follow the organiser’s deadline, which can be a day or two before the session, and bring a PDF backup either way.
What is the best software for academic slides?
PowerPoint is the safe default because it opens almost everywhere. Beamer suits equation-heavy talks and gives portable PDFs. Google Slides suits collaboration and screen sharing, but depends on an internet connection.
Is a poster session worth doing?
Yes, if you want detailed one-to-one feedback or your work is still early-stage. A poster gives you extended time with curious people and practice explaining the work in plain language; an oral slot reaches more people at once.
How do I handle a question I genuinely don’t know the answer to?
Say so plainly and offer to follow up. Something like “That’s outside the scope of this study, but it’s a good direction” is acceptable. If you give a guess, label it as one first. Bluffing in front of subject experts rarely ends well.
What if my English isn’t fluent?
Prepare more, not less. Write out key sentences, practise until the core phrases feel automatic, and speak slower than feels natural. Check the pronunciation of any term you might mispronounce. Audiences cope with accents better than with speed.
Can I present from notes?
Yes, if they are minimal. A few bullets on index cards or in your slide notes work as a safety net. Reading a full script word for word kills eye contact and sounds flat.
How early should I arrive on conference day?
About 30 minutes before your session, unless the organiser says otherwise. That gives time to load slides, test the clicker and microphone, and settle. If you are the opening presenter in a session, arrive earlier.
What is different about presenting online or at a hybrid conference?
You manage screen share, audio and camera framing at once, and looking at the camera replaces eye contact. At hybrid events you have two audiences, the room and the screen, so address both.
How many slides should I use for a 15-minute talk?
About 12 to 13 at most, roughly one per minute of the 12 to 13 minutes you plan to speak. Use fewer if your figures need time to explain, and never add slides to cover a talk that runs long.
What if I am running out of time during my talk?
Skip ahead to your key result and conclusion slides instead of speeding up. Chairs may stop speakers who run over, so plan a short version in advance and keep extra material in reserve in case you get more time.
What if nobody asks a question after my talk?
Do not worry; silence is not a verdict. You can prompt discussion by naming a weakness in your own paper or posing a question to the room, and you can invite people to talk with you after the session.
Should I follow up with people I met?
Yes, within a few days while the conversation is fresh. Refer to something specific you discussed, and send anything you promised. A short, specific follow-up is an easy way to start a collaboration.
Conclusion: Your Next Steps
Your first presentation will feel harder than your second, and the skills compound with every talk, as does the track record that becoming a regular speaker at conferences depends on. If you have not submitted yet, start with the abstract. If you are accepted, fix the structure before the slide design: a clear argument presented plainly beats a beautiful deck with no spine.
If you have already presented, reread your Q&A notes. The questions you received show where the argument was unclear and sometimes where the work is more interesting than you credited.
Three small things to put on your calendar:
- Watch one recording of yourself. Twenty minutes of this teaches you more about your voice, pace and body language than hours of reading.
- Email two people you spoke to. Not a mass follow-up, two genuine messages.
- Revise your slides in 30 days. Conference feedback lands differently after some distance.