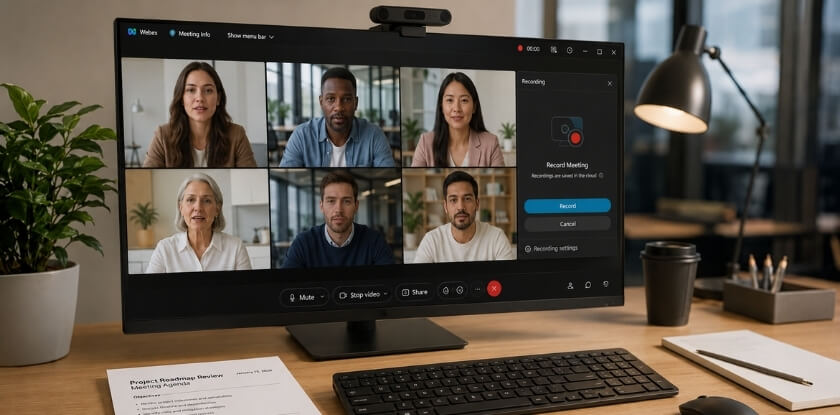
How to Record a Video Conference? [4 Effective Methods]

Ever walked out of a meeting thinking — I really should have recorded that? Maybe a client dropped a critical detail you can’t quite remember, or your team made a decision that nobody wrote down properly. It happens constantly. The frustrating part is that recording should be simple — but every platform hides the feature somewhere different, host permissions block participants from recording without any warning, mobile recording behaves nothing like desktop recording, and searching online usually lands you on a guide that covers one platform and ignores everything else. That ends here.

To record a video conference, you generally need to locate the recording option within your platform’s meeting controls, confirm you have the necessary permissions, choose between cloud recording and local recording, and hit start before the conversation you actually need gets going. The five major platforms — Zoom, Google Meet, Microsoft Teams, Webex, and Zoho Meeting — all support built-in recording natively, though the access rules vary significantly between them. On most platforms, only the host or a co-host can start a recording by default, meaning participants are locked out unless the host explicitly grants permission first. When built-in recording is unavailable — say, you’re on a free plan, you’re joining as a participant without rights, or you’re on a mobile device — third-party tools like OBS Studio, Loom, Riverside.fm, or a basic screen recorder on Android or iOS can pick up the slack.

There’s also a layer most guides skip entirely: the legal side. Recording someone without their knowledge can cross GDPR requirements in Europe or two-party consent laws in certain U.S. states — so knowing how to record is only half the job. This guide walks through every major platform step by step, covers what to do on iPhone and Android when the desktop rules don’t apply, explains how AI tools like Otter.ai, Fireflies.ai, and Fathom can generate an AI meeting summary automatically, and shows you how to get the best possible quality through simple microphone setup, bitrate, and resolution adjustments. Whether you need a full recording or just solid meeting minutes, you’ll find exactly what you need below.

What You Need to Know Before Recording a Video Conference

Before you hit that record button, there are a few things that can save you from legal headaches, technical disasters, and awkward mid-meeting moments.

How to Record a Video Conference

Permissions Vary by Platform — and by Your Role

Not everyone in a meeting can record. On Zoom, only the host can start a local or cloud recording by default. Participants need explicit host permission first. Google Meet restricts recording to Google Workspace accounts on specific plans — free personal accounts can’t record at all. Microsoft Teams requires you to be an organizer or have a role that’s been granted recording rights. Webex and Zoho Meeting follow similar host-first models.

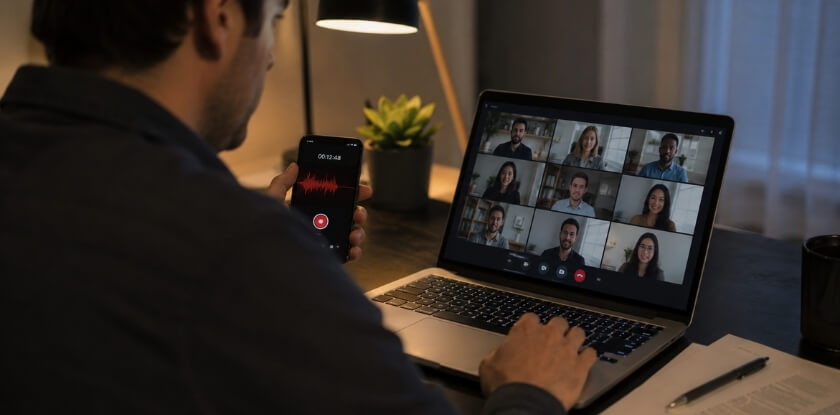
If you’re a participant and you want to record, you have two options: ask the host to enable participant recording, or use a third-party tool like OBS Studio, Loom, or a browser extension like Tactiq to capture what’s on your screen. Just be aware — that second option comes with its own rules.

The Legal Side Is Not Optional

Recording laws differ depending on where your participants are located. In the US, some states follow one-party consent (you can record a call you’re part of without telling anyone), while others like California, Florida, and Illinois require two-party consent — meaning everyone on the call must agree.

Internationally, GDPR applies if any participant is based in the EU. Under GDPR, recording a meeting without informed consent is a data processing violation. That’s not a technicality. It can result in actual fines.

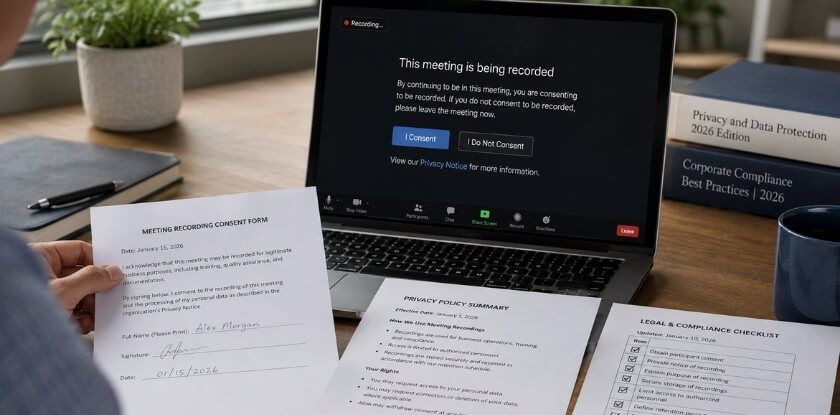
The safest approach: announce the recording at the start of the meeting, ask for verbal acknowledgment, and use a platform that logs consent automatically. Zoom, Teams, and Webex all show a notification banner when recording starts, which creates at least a soft record of disclosure.

Cloud Recording vs. Local Recording

Most platforms give you two options.

Cloud recording stores the file on the platform’s servers. Zoom uploads it to their cloud after the meeting ends. Google Meet saves directly to your Google Drive. Easy to share, but storage limits apply and the file isn’t available instantly.

Local recording saves the file directly to your computer during the meeting. Faster access, no storage caps (beyond your own hard drive), but it only works if your device stays on and stable throughout the session. On mobile — Android or iOS — local recording is either restricted or outright unavailable on most platforms, which is something a lot of people find out at the worst possible time.

Your Audio Setup Matters More Than Your Camera

Poor audio ruins a recording faster than anything else. If you’re recording a video conference for reuse — training, client reference, podcast content — invest five minutes in your microphone setup before the call. A USB microphone or a decent headset beats a laptop’s built-in mic every time.

Background noise is compressible in post with tools like Descript or Adobe Audition, but it’s always easier to capture clean audio upfront than to fix it later.

Third-Party Recording Tools Fill Real Gaps

If your platform doesn’t support recording, or you want more than a raw video file, third-party tools are worth knowing:

  • OBS Studio — free, desktop-based screen recorder with full resolution and bitrate control
  • Riverside.fm — records each participant’s audio and video locally for high-quality separate tracks
  • Otter.ai or Fireflies.ai — join as a meeting bot and generate transcripts plus an AI meeting summary automatically
  • Fathom — free AI notetaker that works inside Zoom, captures highlights in real time
  • Rev — human or AI transcription after the fact, useful if accuracy is critical

These don’t replace platform-native recording in every scenario, but they cover situations where you need transcripts, meeting minutes, or better quality than a compressed cloud file gives you.

How to Record a Video Conference on Zoom

Zoom is probably the most recording-friendly platform out there. It gives hosts solid control, offers both local and cloud recording options, and the interface hasn’t changed dramatically in years — so once you know where things are, you’re set.

Recording a Zoom Meeting as a Host (Desktop)

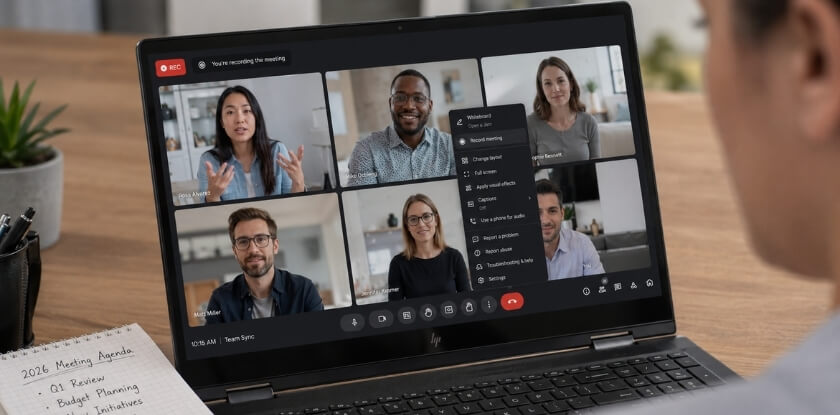
If you’re the host, recording is straightforward. Start your meeting, then look at the toolbar at the bottom of the screen. You’ll see a Record button. Click it, and Zoom will ask whether you want to record to your computer (local recording) or to the cloud.

Local recording saves the file directly to your hard drive — usually to Documents/Zoom by default. You can change this path in Settings → Recording. The output is an MP4 for video and an M4A for audio, and Zoom also generates a chat log text file automatically.

Cloud recording requires a paid Zoom plan (Pro, Business, or higher). The recording processes on Zoom’s servers and shows up in your account at zoom.us/recording once the meeting ends. Cloud recordings can also auto-generate a transcript, which is useful if you’re feeding notes into something like Otter.ai or Descript later.

A few things worth knowing:

  • Zoom records the active speaker view by default. If you want gallery view or a separate audio file for each participant, go to Settings → Recording and check those boxes before the meeting starts.
  • Resolution depends on your plan. Free accounts cap out at 720p. Paid accounts can record at 1080p if you enable HD video in Settings → Video.
  • If you’re sharing your screen, Zoom records that as a separate file labeled “Screen” — handy for separating slides from the webcam feed.

When the meeting ends, Zoom converts the recording. Don’t close your laptop before this finishes or you’ll interrupt the process and may corrupt the file.

Recording a Zoom Meeting as a Participant

This is where it gets more complicated. Participants can’t record by default. The host has to grant permission explicitly.

As a host, you can do this two ways:

  1. Before the meeting: Go to your Zoom web portal → Settings → Recording → toggle on “Local recording” and enable the option to let participants record.
  2. During the meeting: Right-click the participant’s name in the participant panel and select Allow to Record.

Once a participant has permission, they’ll see the same Record button the host sees. They can only save locally — cloud recording stays host-only.

If you’re a participant and the host won’t grant permission, your options are narrower. You could use a third-party screen recorder like OBS Studio running in the background, but you should absolutely get verbal or written consent from all participants first — two-party consent laws apply in many U.S. states and most of Europe under GDPR. Don’t skip that step.

There’s another route worth knowing: AI notetaking tools like Fathom, Fireflies.ai, or Otter.ai can join your Zoom meeting as a bot. They record and transcribe automatically, and some generate an AI meeting summary at the end. Fathom in particular integrates directly with Zoom and is free for individuals. These tools don’t require host permission to join as a participant themselves, but participants still see the bot in the room — so it’s not invisible.

Recording on the Zoom Mobile App (Android and iOS)

Mobile recording on Zoom is limited compared to desktop, and that limitation is intentional.

On Android and iPhone (iOS), local recording isn’t available through the Zoom app itself. If you want to record, you need a paid Zoom account with cloud recording enabled. Here’s how:

  1. Join or start your meeting in the Zoom mobile app.
  2. Tap the three-dot More button in the bottom-right corner.
  3. Select Record to the Cloud.

That’s it. The recording uploads to your Zoom cloud storage, same as desktop cloud recordings.

If you’re on a free plan and need to record from your phone, you’ll have to use your device’s built-in screen recorder. On iPhone, swipe to open Control Center and tap the Screen Recording button (add it in Settings → Control Center if it’s not there). On Android, the process varies slightly by manufacturer — Samsung devices have a built-in screen recorder in the quick settings panel, while stock Android added native screen recording in Android 11.

One catch with phone screen recording: it captures system audio differently depending on the device. On iPhone, internal audio records fine. On some Android devices, third-party apps can’t capture internal audio due to OS restrictions, meaning you might only record the microphone audio from the room — not the clean audio from the call itself.

For anything important — a client call, a recorded interview, a training session — record from desktop if you can. Mobile should be a backup.

How to Record a Video Conference on Google Meet

Google Meet’s recording feature isn’t available to everyone by default. You need a Google Workspace plan — specifically Business Standard, Business Plus, Enterprise, or Education Plus. Free personal Gmail accounts don’t get it. If you’re on a paid plan but still don’t see the option, your Workspace admin may have it turned off. Check with them first before assuming something’s broken.

How to Record a Video Conference on Google Meet

One more thing: only the meeting host (or a co-host) can start a recording in Google Meet natively. Participants can’t record on their own through the built-in tool. If you’re a participant who needs a recording, you’ll either need to ask the host or use a third-party screen recorder like OBS Studio running in the background.

Recording Google Meet on Desktop

Once your Workspace account has recording enabled, the steps are straightforward.

Start or join your meeting. Click the Activities icon in the bottom-right corner — it looks like three horizontal lines or a star, depending on your version. Select Recording, then click Start recording. Google Meet will prompt you to ask for consent from participants before it starts. Everyone in the call sees a notification banner that recording has begun, so there’s no way to record silently here.

When you’re done, go back to Activities → Recording → Stop recording. The recording also stops automatically when everyone leaves the meeting.

The file saves to the meeting host’s Google Drive, inside a folder called Meet Recordings. You’ll get an email with a direct link once it’s processed, which usually takes a few minutes. Video quality depends on your internet connection and screen resolution — Google Meet records at up to 1080p on supported plans, but it defaults to lower resolution on unstable connections.

If you’re on a free plan or want more control over quality and format, OBS Studio is a solid fallback. Set it up to capture a specific window (your browser with Meet open), choose your output resolution and bitrate manually, and you’ve got a local recording with no Workspace restrictions. For automatic transcription alongside your recording, tools like Otter.ai or Fireflies.ai can join your meeting as a bot participant and generate an AI meeting summary independently of the video file.

Recording Google Meet on Android and iPhone

This is where things get frustrating. The Google Meet mobile app — on both Android and iOS — does not support native recording at all, even if you’re the host on a paid Workspace plan. Google simply hasn’t built that feature into the mobile app yet.

Your options are limited but workable.

On Android, you can use your phone’s built-in screen recorder. Most Android phones running Android 11 or later have one in the quick settings panel. Pull down from the top of the screen, find “Screen Recorder,” and tap it before joining the call. It captures everything on screen including the Meet call. Audio capture varies by device — some record internal audio cleanly, others only pick up the microphone. Test it once before a real meeting.

On iPhone, iOS 11 and later include a screen recording shortcut through the Control Center. Go to Settings → Control Center → Screen Recording and add it. Then swipe down from the top-right corner to access it mid-call. The catch: iOS screen recording picks up microphone audio by default, not internal system audio. To get both your voice and the other participants’ voices clearly, press and hold the screen recording button and make sure microphone audio is toggled on. Results are decent but not perfect.

Neither mobile method gives you the participant notification banner that the desktop recording tool shows. This is a legal grey area depending on your jurisdiction — two-party consent states or countries with GDPR obligations require you to inform participants before recording. Don’t skip that step just because the app doesn’t force it.

If mobile recording quality matters to you, the better path is to avoid recording from mobile entirely. Join from a laptop when you know you’ll need a recording.

How to Record a Video Conference on Microsoft Teams

Teams handles recording a bit differently than Zoom or Google Meet. The recording doesn’t live on your computer — it goes to the cloud, either in OneDrive or SharePoint, depending on your org’s setup. That means you need a Microsoft 365 subscription that includes recording features, and you need the right permissions turned on by your IT admin.

One important thing: Teams doesn’t let just anyone start a recording. The host (organizer) can always do it, but co-organizers and presenters may also have the ability — depending on how your tenant is configured. Regular attendees? They can’t record at all, at least not through the native tool.

Starting a Recording as a Host in Teams

Once your meeting is live, click the three-dot menu (the “More” icon) in the meeting toolbar. From there, select Start recording. That’s it — Teams will immediately notify all participants with a banner that the meeting is being recorded. You can’t hide it from them, which is actually good from a consent standpoint.

The recording captures video, audio, and screen shares. It won’t capture whiteboards or breakout room activity unless someone separately records inside those rooms.

To stop, go back to the same three-dot menu and hit Stop recording. After the meeting ends, Teams automatically stops any active recording too. The file processes for a few minutes, then shows up in the chat as a shareable link. The actual file lands in the organizer’s OneDrive under a folder called Recordings.

A few things to know:

  • If you’re using Teams Free (not the paid Microsoft 365 version), recording may not be available to you at all.
  • Admins control recording policies at the tenant level. If you see the option greyed out, that’s a permissions issue — not a bug.
  • Recording expiration is a real thing. By default, Microsoft sets recordings to auto-delete after 60 or 120 days depending on your license. Check your policy settings if long-term storage matters to you.
  • Teams also offers a Transcription feature alongside recording. Turn it on from the same “More” menu. It generates a live transcript that gets attached to the recording — useful if you’re feeding it into something like Otter.ai or Fireflies.ai afterward, or just want searchable meeting minutes without rewatching the whole thing.

If your organization uses Teams but you need higher-quality standalone recording for things like client-facing content, OBS Studio or Loom are reasonable options to run in parallel. OBS captures your entire screen at whatever bitrate you set, and it doesn’t depend on Teams permissions at all.

Recording on the Teams Mobile App

Recording from the Teams mobile app — whether Android or iPhone — is possible, but with restrictions. You can only start a recording from mobile if you’re the meeting organizer or have been granted presenter rights. The steps are similar to desktop: tap the three-dot menu during a live call, then tap Start recording.

One catch on iOS: iPhones have Apple’s built-in screen recorder in the Control Center, which some people use as a workaround when native recording isn’t available. It records everything on screen with audio. It works, but it’ll pick up notification sounds, and the video quality depends on your phone’s screen resolution — not the meeting stream itself. For anything professional, it’s not ideal.

On Android, the native screen recorder (available on most devices running Android 10 or later) works similarly. Again, it’s a screen capture, not a direct recording of the meeting stream, so quality varies.

The real limitation on mobile is that you can’t manage the recording the same way. Files still go to OneDrive, but you won’t get the same notification controls or transcription options you’d have on desktop. If you’re running a serious recorded session, use desktop whenever you can and treat mobile recording as a last resort.

How to Record a Video Conference on Webex

Webex handles recording a bit differently depending on whether you’re on a free plan or a paid one — and that distinction matters more here than on most other platforms.

How to Record a Video Conference on Webex

Free vs. Paid: What You Can Actually Do

On the free Webex plan, you get local recording only. That means the recording saves directly to your computer, not to Cisco’s cloud. Paid plans (Webex Meet, Webex Suite, or any enterprise tier) unlock cloud recording, which is stored in your Webex site and can be shared via link.

If you’re a participant and not the host, you cannot record by default. The host has to grant you recording privileges explicitly during the meeting. No workaround exists within Webex itself — if you need a recording and the host won’t enable it, you’re looking at a third-party screen recorder like OBS Studio.

How to Start Recording as a Host

Once you’re in a Webex meeting as host:

  1. Look at the bottom control bar and click Record
  2. A prompt will ask whether to record to the cloud or locally — choose based on your plan and storage needs
  3. Click Record again to confirm
  4. A red indicator appears at the top of the screen so all participants can see recording is active

That’s it. Webex automatically notifies participants when recording starts, which helps with consent law compliance — though you should still verbally announce it, especially in jurisdictions with two-party consent rules like California or any GDPR-covered territory.

To stop, hit the same Record button and select Stop.

Where Your Recording Goes

Local recordings save as MP4 files (video) and ARF or VTT files (transcripts, if enabled). Default save location is your Documents folder under a “Webex” subfolder. You can change this in Webex preferences before the meeting.

Cloud recordings land in your Webex site under Recordings in the left nav. From there you can download, share, or delete them. Cloud recordings are kept for 30 days on basic plans — longer on enterprise, depending on your admin settings.

One thing to watch: cloud recordings are set to public by default in some Webex configurations. Go into the recording settings and flip it to password-protected before sharing a link with anyone outside your organization.

Giving Participants Permission to Record

If you need a co-host or participant to handle the recording:

  1. Right-click their name in the participant panel
  2. Select Allow to Record

They’ll then see the Record button in their own controls. Only one person can be the active recorder at a time.

Recording on Mobile (Android and iOS)

Webex’s mobile app — available on both Android and iPhone — does support recording, but only cloud recording. Local recording is desktop-only.

In the app, tap the three-dot More menu during a meeting, then tap Record. Same cloud storage rules apply. If you’re on the free plan, the option may be grayed out entirely.

Getting a Transcript

Webex has built-in transcription on paid plans. Before the meeting, go to your Webex site settings and enable Webex Assistant — this generates an AI-based transcript tied to the recording.

If your plan doesn’t include it, you can run the downloaded MP4 through Otter.ai or Fireflies.ai after the fact. Descript is also a solid option if you want to edit the transcript and the video together in one place. For a quick AI meeting summary without the full editing suite, Fathom or Tactiq (as a browser extension) can sit alongside Webex and generate notes in real time.

Quality Settings Worth Adjusting

Webex defaults to a reasonable video quality, but if you’re recording a webinar or client presentation you want to reuse:

  • Go to Preferences > Video and set your camera resolution as high as your hardware supports
  • Check your microphone setup — Webex sometimes defaults to the built-in laptop mic even when an external one is plugged in. Confirm the input source before every meeting
  • For cloud recordings, the resolution cap depends on your Webex plan. Basic plans often cap at 720p; higher tiers support 1080p

Local recordings reflect your actual stream quality, so a better camera and proper lighting will directly improve the output file — no bitrate setting to tweak on your end.

How to Record a Video Conference on Zoho Meeting

Zoho Meeting is the underdog here. It doesn’t get as much attention as Zoom or Teams, but if your company is already in the Zoho ecosystem, it’s probably your default conferencing tool — and it does have built-in recording, with some limitations worth knowing upfront.

Who Can Record

Only the host can record in Zoho Meeting. There’s no co-host recording option, and participants can’t trigger a recording themselves. If you’re joining someone else’s meeting, you’re not recording it unless you use a third-party screen recorder on your own machine.

Recording is also tied to your subscription tier. The free plan does not include recording. You’ll need at least the Standard plan ($3/host/month as of 2024) to get cloud recording access. Check your plan before you assume this feature is available.

How to Start Recording

Once you’re in a meeting as the host:

  1. Click the Record button in the bottom toolbar — it looks like a camera icon
  2. A notification banner appears for all participants saying the meeting is being recorded
  3. The recording starts immediately; there’s no countdown or confirmation dialog

To stop recording, click the same button again. You can pause and resume if you need to skip a sensitive portion of the call.

Where the Recording Goes

Zoho Meeting saves recordings to the cloud automatically. After the meeting ends, processing takes anywhere from a few minutes to about 30 minutes depending on session length. You’ll get an email with the recording link once it’s ready.

To access recordings manually:

  • Log into your Zoho Meeting account
  • Go to Past Meetings in the left sidebar
  • Click the meeting entry and look for the Recording tab

From there you can download the MP4 file, share a link, or delete it. Storage limits depend on your plan — Standard gives you 10 GB, Pro gives you 100 GB.

Audio Quality and Resolution

Zoho Meeting records at up to 720p by default. There’s no in-app setting to bump this to 1080p — the output resolution largely depends on the content being shared and the host’s display. If you’re recording a screen share presentation, that will look fine. Face-cam-only calls at 720p are acceptable but won’t win any visual awards.

For audio, make sure your microphone is properly configured before the meeting starts. A USB condenser mic or even a decent headset makes a noticeable difference in recording clarity. Zoho Meeting doesn’t do any post-processing on audio, so what you capture is what you get.

No Mobile Recording

This is a hard limitation. Zoho Meeting’s Android and iOS apps do not support in-app recording as of now. If you need to record from an iPhone or Android device, your only option is using the device’s built-in screen recorder — though that captures everything on screen and doesn’t give you a clean, separate audio track. Not ideal for professional use.

For anything that needs to be properly recorded, run the meeting from a desktop browser or the desktop app.

Using Third-Party Tools Alongside Zoho Meeting

If you want transcripts or an AI meeting summary, Zoho Meeting doesn’t have that built in. You can connect Otter.ai or Fireflies.ai by inviting the bot as a participant — both work as long as you send a meeting invite link. Fathom doesn’t officially support Zoho Meeting at this time, so skip that one.

Tactiq has a browser extension that works with Zoho Meeting in Chrome. It generates live captions and exports a transcript after the call. That’s probably the easiest add-on if you just need meeting minutes without switching platforms.

Consent and Legal Compliance

Zoho Meeting does notify participants automatically when recording starts, which covers basic consent requirements in most jurisdictions. But automatic notification isn’t always enough — particularly under GDPR or in two-party consent states like California, Illinois, or Florida. You should still verbally announce the recording at the start of the meeting and ideally get a verbal acknowledgment, especially if participants are in different legal jurisdictions.

If you’re recording external clients or people outside your organization, a brief written consent in the meeting invite goes a long way toward protecting you.

Quick Summary

Zoho Meeting recording works fine for teams already using Zoho apps. The main friction points are the paid-plan requirement, the 720p ceiling, and the complete absence of mobile recording. For transcription and AI summaries, you’ll need a third-party integration — Otter.ai and Tactiq are the most practical options here.

Platform Comparison — Which One Makes Recording Easiest?

If you’ve worked through the individual platform guides, you’ve probably noticed some clear differences. Let’s put them side by side so you can make a real decision based on how your team actually works.

Recording Access Without a Paid Plan

This is where most people get tripped up.

  • Zoom gives local recording to all users, including free accounts. You can record to your computer the moment the meeting starts — no admin approval needed if you’re the host. Cloud recording requires a paid plan (Pro or higher).
  • Google Meet is the most restrictive here. Free personal accounts get no recording feature at all. You need Google Workspace Business Standard or higher, which starts around $14/user/month. Even then, only the host or co-host can start it.
  • Microsoft Teams sits in the middle. Recording is available on paid Microsoft 365 plans. Teams Essentials ($4/user/month) includes meeting recording, which makes it the most affordable cloud-recording option of the five. Free Teams accounts lost recording access in 2023.
  • Webex is surprisingly generous. The free Webex plan includes local recording. Cloud recording requires Webex Meet or a higher tier. For small teams that just want a simple recording without paying, Webex and Zoom are your two realistic options.
  • Zoho Meeting offers recording on its paid plans (Professional starts at $3/host/month), but not on the free tier. It’s the cheapest paid option if recording is your only concern.

Who Can Start the Recording?

PlatformHostCo-hostParticipant
ZoomYesYes (if enabled)Yes (with host permission)
Google MeetYesYesNo
Microsoft TeamsYesYesNo
WebexYesYesNo
Zoho MeetingYesYesNo

Zoom is the only platform that lets participants record natively — but only if the host explicitly grants that permission first. Every other platform locks recording to hosts and co-hosts. If your team has meetings without a designated host, Zoom’s participant recording feature solves a real practical headache.

Cloud vs Local Recording

Zoom gives you both — cloud on paid plans, local on all plans. That flexibility is hard to beat.

Google Meet records only to Google Drive. There’s no local recording option whatsoever. If your Drive storage is full or your organization restricts where files can go, that’s a problem.

Microsoft Teams saves recordings to OneDrive (for 1:1 calls) or SharePoint (for channel meetings). Again, no local option. Large enterprises generally prefer this because it keeps everything in their existing Microsoft environment.

Webex splits neatly: local recording free, cloud recording paid. Clean and predictable.

Zoho Meeting saves cloud recordings to Zoho’s own storage, with limits based on your plan. Local recording is available on paid plans. Storage caps are lower than Webex or Teams, so if you’re recording frequently, watch your quota.

Mobile Recording

None of these platforms let you record locally from a phone. All mobile recording goes to the cloud.

On Zoom, mobile recording requires a paid account and sends the file to Zoom cloud storage. On Google Meet, iPhone and Android users can only record if they’re the organizer and have a qualifying Workspace plan. Microsoft Teams mobile recording works the same way as desktop — files go to OneDrive/SharePoint. Webex and Zoho both restrict mobile recording to paid users with cloud recording enabled.

If you’re regularly hosting from a phone, this matters. You’ll need a paid plan on whichever platform you use. There’s no workaround through the native apps.

For mobile hosts who need more control, a third-party screen recorder app on Android, or the built-in screen recording on iOS (iPhone), captures the meeting regardless of platform permissions — though you lose separate audio tracks and the quality depends heavily on your phone’s microphone.

AI Transcription and Meeting Summaries

This is where the platforms diverge quickly.

Zoom includes AI Companion with paid plans, which generates transcripts and AI meeting summaries automatically after the call. It’s built in — nothing extra to install.

Google Meet’s transcription feature requires Workspace Business Standard or higher and produces a Google Doc transcript. Gemini-powered summaries are available on higher tiers. It works, but the summary quality is inconsistent.

Microsoft Teams Copilot is powerful but expensive. You need a Microsoft 365 Copilot license on top of your Teams plan — that’s an extra $30/user/month. For most small teams, that price sends them straight to third-party tools like Otter.ai, Fireflies.ai, or Fathom instead.

Webex has Webex Assistant built into higher-tier plans. It does real-time transcription and generates highlights. It’s solid, and it works without any external tool.

Zoho Meeting has no native AI transcription. If you need a transcript, you’re pulling the recording and running it through Rev, Descript, or Otter.ai manually.

The Honest Verdict

  • Zoom wins on flexibility. Local recording on free accounts, participant recording with permission, mobile cloud recording, and built-in AI on paid plans. It’s the most forgiving for mixed teams where not everyone has a paid seat.
  • Microsoft Teams wins for enterprise integration. If your company already runs on Microsoft 365, recordings landing in SharePoint automatically is genuinely convenient. The Copilot AI is powerful if budget isn’t an issue.
  • Google Meet is the most limiting. High plan requirement, Drive-only storage, no local recording. If you’re already paying for Workspace, it’s fine. But you wouldn’t choose it just for recording.
  • Webex is underrated for small teams. Free local recording, affordable paid plans, decent built-in AI. It doesn’t get enough credit.
  • Zoho Meeting makes sense only if you’re already in the Zoho ecosystem. The recording features are basic, the price is low, and the lack of AI transcription is a real gap you’ll need to fill elsewhere.

How to Record a Meeting Without Host Permission

Not everyone in a meeting is the host. And hosts don’t always enable recording for participants. That’s a real problem when you need a record of what was said — especially for a client call, a job interview, or a training session you’re attending, not running.

How to Record a Meeting Without Host Permission

There are two realistic options here: a screen recorder running in the background, or a browser extension that captures the tab directly. Neither requires the other person to grant you anything inside Zoom or Teams. But — and this matters — neither option removes your legal obligation to get consent. Recording someone without telling them is illegal in many places. Tell people. It takes five seconds.

Using a Third-Party Screen Recorder

A screen recorder captures whatever is happening on your display. It doesn’t touch the meeting platform at all. The platform never knows it’s running.

OBS Studio is the most capable free option. It’s open-source, records at whatever resolution and bitrate you set, and saves locally. For a meeting recording, 1080p at 3,000–4,000 kbps is more than enough. You’ll want to set your audio input to capture both your microphone and your system audio (the “Desktop Audio” source in OBS). If you only capture the mic, you’ll record your own voice but not the other participants. That’s a common mistake.

The downside with OBS is setup time. It’s not designed for casual use. If you want something simpler, Loom works as a desktop recorder and uploads automatically to the cloud. Start a Loom recording before the meeting opens, stop it when the call ends. You get a shareable link within seconds.

Riverside.fm is worth mentioning here too, though it works differently. If you’re the one organizing the call, you can route participants through Riverside instead of Zoom or Meet. It records each participant’s audio and video track separately, locally, which gives you much cleaner quality than any screen capture method. It’s not useful if someone else is running the meeting, but if you have control over the setup, it’s a significant step up.

For mobile — whether Android or iPhone — the built-in screen recorder on both platforms works fine. On iOS, you add it to Control Center under Settings > Control Center, then swipe and tap. On Android, it’s usually in the Quick Settings panel. Neither captures internal audio reliably on all devices, so test before a real meeting.

One practical note: if you’re recording a meeting you didn’t organize, tell everyone before the recording starts. Drop a message in the chat. Something like “I’m recording this for my notes — let me know if anyone objects” takes three seconds and protects you legally under most two-party consent laws.

Recording with a Browser Extension

If your meetings run in a browser — which Google Meet and the web version of Teams and Webex often do — a browser extension can capture the tab directly without needing a full screen recorder running.

Tactiq is one of the more useful ones here. It’s a Chrome extension that transcribes your Google Meet or Zoom calls in real time and generates a summary. It doesn’t record video, but if what you actually need is a written record of what was said, Tactiq does that job without any host permission required. It works through the browser’s access to the audio stream, not through the platform’s recording feature.

Fathom operates similarly. Install the extension, join a meeting, and it records and transcribes automatically. It integrates with Zoom natively but also works as a browser overlay on other platforms. The free tier is genuinely useful — you get unlimited recordings and summaries.

For raw video capture via extension, options are more limited. Most Chrome screen-capture extensions (like Screencastify or Loom’s browser extension) effectively just run a screen recorder in the browser context. They’ll capture video and audio from the tab, but you need to make sure your microphone is also included in the capture settings, otherwise you’ll miss your own side of the conversation.

Otter.ai and Fireflies.ai take a slightly different approach — they join your meeting as a bot participant. You connect them to your calendar, and they show up as a “notetaker” in the call. Some people find this more transparent than a silent screen recorder, since the bot’s presence is visible to everyone. Others find it awkward. Either way, all participants can see it’s there, which handles the consent question cleanly.

The real limitation of browser extensions is video quality. You’re capturing a compressed stream from the browser, not a native recording. For transcription and meeting notes, that’s fine. For anything where video quality matters — like a recorded client presentation you want to reuse — a proper screen recorder or a dedicated platform is the better call.

Tips to Optimize Recording Quality (Resolution, Bitrate, and Mic Setup)

A recording is only useful if people can actually hear and see what’s happening. Blurry video and muffled audio make even a perfectly organized meeting useless to anyone who wasn’t there. Here’s how to fix the common problems before they happen.

Set Your Resolution Before You Hit Record

Most platforms default to 720p, which is fine for internal note-taking but looks rough when you’re sharing recordings externally or editing them in something like Descript.

Zoom lets you push to 1080p HD recording, but you have to enable it manually. Go to your Zoom web portal → Settings → Recording → enable “Record in HD.” Without that toggle, you’re stuck at 720p even if your camera supports 4K.

Google Meet caps recording quality based on your Google Workspace plan. Business Starter users get 720p. Business Standard and above can hit 1080p, but it’s not a setting you control directly — it scales with your connection quality.

Microsoft Teams records at up to 1080p through the cloud, but only if your network and device can support it. Local recordings through OBS Studio give you more control — you can set output resolution to 1920×1080 or higher in OBS under Output → Recording → Video settings.

Webex and Zoho Meeting both cap cloud recordings at 720p on standard plans. If quality matters, record locally using a screen recorder and set your display resolution to 1080p before the call starts.

Bitrate Actually Matters More Than Resolution

Resolution tells you how many pixels. Bitrate tells you how much information is captured per second. A 1080p recording at a low bitrate looks blocky and washed out — worse than a clean 720p file at higher bitrate.

For video, aim for at least 4–8 Mbps for 1080p recordings. For 720p, 2.5–4 Mbps is workable.

If you’re using OBS Studio as your capture tool, go to Settings → Output → Recording and set:

  • Rate Control: CBR (Constant Bitrate)
  • Bitrate: 5000–8000 Kbps for 1080p
  • Encoder: NVENC (if you have an NVIDIA GPU) or x264 otherwise

For most meeting platforms recording natively, you don’t control bitrate directly. What you can control is your network. A wired Ethernet connection is always better than Wi-Fi for recording quality. Even a 5GHz Wi-Fi connection drops packets under load, which shows up as compression artifacts in your cloud recording.

Microphone Setup Is the Biggest Variable

Bad audio kills recordings faster than bad video. People tolerate grainy visuals. They don’t tolerate echo, background noise, or someone who sounds like they’re calling from inside a refrigerator.

A few practical fixes:

Use a dedicated microphone if you can. Built-in laptop mics pick up fan noise, keyboard clicks, and room echo. A USB mic like the Blue Yeti or Rode NT-USB costs $100–$150 and makes an immediate difference.

If you’re on a budget, a pair of wired earbuds with a built-in mic beats your laptop’s microphone every time. The mic is closer to your mouth. That’s the whole reason it works better.

Enable noise suppression at the platform level. Zoom has “Background Noise Suppression” under Audio Settings — set it to “Auto” or “High.” Teams has “Noise suppression” under Devices settings. Both use AI-based filtering that genuinely removes keyboard noise and HVAC hum in real time.

Check your input levels before the call starts. You want your voice peaking around -12 dB to -6 dB. Anything consistently hitting 0 dB will clip and distort in the recording. Zoom shows a live mic meter in Audio Settings. Use it.

One-speaker-at-a-time discipline helps enormously. Crosstalk doesn’t just make conversation hard to follow — it confuses transcription tools like Otter.ai and Fireflies.ai, which split audio into per-speaker segments. Clean, separated speech means more accurate AI meeting summaries afterward.

Lock Your Environment, Not Just Your Settings

Close other browser tabs before recording. Each open tab that’s streaming video or audio competes for bandwidth and CPU. On older machines, this causes frame drops in the recording.

Close Slack, email notifications, and anything else that pops up on screen — especially if you’re doing a screen share. Notification banners showing private messages in a recorded session are awkward at best and a compliance problem at worst.

If you’re recording through a browser extension like Loom or Tactiq, make sure no other extensions are injecting scripts that interfere. It’s rare, but some ad blockers conflict with recording extensions and cause partial captures or missing audio tracks.

Mobile Recording Has Different Limitations

Recording on Android or iOS cuts your quality options significantly. Most platform apps on mobile — Zoom, Teams, Google Meet — only allow cloud recording if the host enables it from a desktop account first. You can’t change resolution or bitrate settings from a mobile device.

If you need higher quality from an iPhone, use the built-in iOS screen recorder (Control Center → Screen Recording) while the meeting runs in the app. It records at your device’s native resolution and captures internal audio. Just remember to enable microphone capture if you’re participating in the conversation, not just watching.

On Android, screen recording quality depends on your device. Samsung’s built-in recorder and third-party apps like AZ Screen Recorder both support 1080p at reasonable bitrates. Test before an important meeting — not during one.

Test Before Anything Matters

Do a five-minute test recording with a colleague before your first high-stakes meeting. Play it back on a different device. Listen through headphones. Watch for lip-sync issues, audio dropout, and visual compression artifacts. It takes ten minutes and saves you from discovering a problem after the fact, when you can’t do anything about it.

How to Edit Clips and Export Highlights from a Recorded Meeting

Raw meeting recordings are almost never usable as-is. A 90-minute Zoom call has 20 minutes of people saying “can you hear me?” and another 15 minutes of someone sharing the wrong screen. What you actually need is probably 10 minutes of it.

How to Edit Clips and Export Highlights from a Recorded Meeting

Here’s how to get from the full recording to something worth sending.

What You’re Starting With

Most platforms dump recordings in one of three formats:

  • Zoom local recordings export as MP4 (video) + M4A (audio) + a chat log
  • Google Meet saves to Google Drive as a single MP4
  • Microsoft Teams stores recordings in OneDrive or SharePoint as MP4
  • Webex gives you MP4 or ARF depending on your plan
  • Zoho Meeting exports MP4 to cloud or local storage

The MP4 from all of these is completely standard. Any editor handles it. You don’t need to convert anything.

Descript: The Fastest Way to Cut Meeting Recordings

Descript is genuinely the best tool for this specific use case. You upload the recording, it transcribes the audio, and then you edit the video by editing the text. Delete a paragraph from the transcript — that chunk of video disappears. It’s that literal.

For meeting recordings, this is fast. You scan the transcript, cut the filler, and export a tightened clip in maybe 20 minutes.

Descript free tier allows 1 hour of transcription per month. Paid plans start at $12/month. The export resolution goes up to 4K on paid plans.

Steps:

  1. Upload your MP4 to Descript
  2. Wait for transcription (usually 2–5 minutes for a 60-minute file)
  3. Highlight and delete any text segments you don’t need
  4. Use Scenes to break the recording into separate clips
  5. Export individual scenes as MP4 or export the full edited video

One thing Descript does well: it can remove filler words (“um,” “uh,” “like”) automatically across the entire recording with one click. For internal training videos or client recaps, that alone saves serious time.

Riverside.fm for High-Quality Highlight Clips

If the meeting was recorded in Riverside.fm to begin with, you already have separate tracks per participant. That’s a big advantage. You can edit each speaker’s audio independently, fix someone’s terrible mic, or cut a single speaker’s response without touching the rest.

Riverside has a built-in clip editor. You select a section of the transcript, hit “Create Clip,” and it exports a formatted short-form video with captions. This is aimed at podcast and social content, but it works fine for pulling a 3-minute highlight from a 60-minute executive briefing.

If you didn’t record in Riverside originally, you can still upload an external MP4 and use the editor — though you lose the separate audio tracks.

OBS Studio for Reprocessing and Re-recording Segments

OBS Studio isn’t really an editor, but there’s a useful trick here. If you need to re-narrate part of a recording — say, to explain something a speaker glossed over — you can play the original recording in a window, capture it with OBS, record yourself talking over it, and export a new version with your voiceover mixed in.

It’s clunky compared to Descript, but OBS is free and the output quality is excellent if you set the bitrate correctly. For a 1080p export, use 8000 kbps video bitrate minimum.

Otter.ai, Fireflies.ai, and Fathom for Text-Based Highlights

These three aren’t video editors — they’re AI meeting summary tools. But “highlights” doesn’t always mean video clips. Sometimes it means a written summary with timestamps.

  • Otter.ai generates a searchable transcript with speaker labels. You can highlight any section and share just that excerpt as a link. No video editing needed.
  • Fireflies.ai creates what it calls “Soundbites” — you mark moments in the transcript, and it exports a shareable audio clip of just that segment.
  • Fathom focuses on action items and decisions. If someone on the call said “we’ll ship this by Friday,” Fathom flags it. You can export a PDF of just those moments rather than the full recording.

For internal async updates — sending someone “here’s what you missed” — these tools are often faster than editing a video clip at all.

Tactiq for Pulling Quotes Directly

Tactiq is a browser extension (Chrome and Edge) that captures live transcripts during Google Meet, Zoom, and Teams calls. During the meeting, you highlight lines you want to save. After the call, Tactiq exports only those selected quotes as a structured document.

This is useful when you don’t need a video clip at all — just the three key decisions from a 45-minute planning session, formatted and exportable as a Google Doc or Notion page.

Getting Transcripts Professionally Edited with Rev

If accuracy matters — legal depositions, client-facing materials, compliance documentation — run your transcript through Rev. It’s a human transcription service that charges $1.50 per minute. You upload the audio or video, and within 12 hours you get a corrected, speaker-labeled transcript.

AI transcription from Otter or Fireflies is about 85–90% accurate on clean audio. Rev gets you to 99%+. For anything that’s going into a formal document, the difference matters.

Exporting Highlights: Practical Formats

Depending on where the highlights are going, you’ll want different formats:

Use CaseRecommended Format
Internal team updateMP4 clip under 5 minutes
Client recapPDF summary with timestamps + embedded clip link
Training materialDescript-edited MP4, captions on, exported at 1080p
Social/LinkedIn clipRiverside short-form export with captions, vertical or square crop
Legal/compliance recordUnedited original MP4 + Rev transcript, stored with GDPR-compliant retention policy

Don’t over-engineer this. Most of the time, a Descript edit and a 1080p export is all you need. The other tools exist for specific situations.

One Thing People Get Wrong

People trim the recording, then forget to trim the transcript. If you’re using Otter or Fireflies to generate meeting minutes, the AI summary is based on the full original file — not your edited clip. If you cut 20 minutes of pre-meeting chatter from the video but don’t re-upload the trimmed audio, the AI summary still includes all of it.

Either re-upload the edited audio file to your transcription tool, or just manually delete the irrelevant sections from the auto-generated summary before you share it. Takes two minutes. Worth doing.

How to Create a Meeting Summary and Minutes from a Recording

Sitting through a 90-minute call and then trying to write up what happened from memory is a terrible idea. The good news is you don’t have to. Once you have a recording, turning it into structured notes is faster than ever — and you’ve got several ways to do it depending on how much manual effort you want to put in.

Manual Transcription vs. AI Tools

Let’s get the manual route out of the way first. If your meeting was short, low-stakes, and you just need a few bullet points, you can watch the recording back at 1.5x speed and write notes yourself. That’s totally fine. But for anything longer than 20 minutes, or anything you need to share with people who weren’t there, an AI transcription tool will save you a lot of time.

The tools worth knowing:

  • Otter.ai — Connects directly to Zoom and Google Meet. It can join as a bot participant, transcribe in real time, and generate a summary automatically. The free plan gives you 300 minutes of transcription per month.
  • Fireflies.ai — Similar to Otter but stronger on action item extraction. It integrates with Teams, Zoom, Webex, and Google Meet. It’ll pull out things like “John will send the proposal by Friday” and list them separately.
  • Fathom — Specifically built for Zoom. Free for individuals. It records, transcribes, and highlights key moments during the call. After the meeting you get a summary with timestamps.
  • Tactiq — Works as a browser extension, so it captures transcripts directly inside Google Meet or Teams without needing a bot to join the call. Useful if your company restricts third-party bot access.

Getting a Transcript from the Recording File

If you already have a recording file — MP4, MKV, whatever format your platform exports — you can feed it directly into a transcription service rather than running a live tool.

  • Descript handles this well. Drop the video file in, it transcribes it, and then you can edit the transcript like a text document. Correct speaker names, cut filler words, export a clean transcript as a PDF or Word file.
  • Rev is another option if accuracy matters more than speed. Human transcriptionists turn it around in about 12 hours at $1.50 per minute. Expensive for long meetings, but the output is cleaner than any AI tool for meetings with heavy accents or crosstalk.

If you’re on a budget, Whisper (OpenAI’s open-source model) can transcribe locally on your machine for free. It requires a bit of command-line setup, but the accuracy is genuinely impressive.

Turning a Transcript into Proper Meeting Minutes

A raw transcript isn’t meeting minutes. It’s everything everyone said, including the off-topic stuff about someone’s WiFi dropping and the five-minute detour into weekend plans.

You need to process it down into:

  1. Attendees — who was on the call
  2. Key discussion points — what was actually decided or debated
  3. Action items — who’s doing what, by when
  4. Next steps or follow-up date

Fireflies.ai does a decent job of this automatically. So does Otter.ai’s “Action Items” feature. But if you want precise control, paste the full transcript into ChatGPT or Claude with a prompt like: “Here’s a meeting transcript. Extract the key decisions made, list all action items with owners and deadlines, and summarize each agenda item in 2-3 sentences.” You’ll get something usable in under a minute.

Where to Store and Share the Summary

Don’t just email the minutes as an attachment. Nobody finds attachments later.

If your team uses Notion, paste the summary there and link to the recording. If you use Confluence, same thing — create a page per meeting with the date, attendees, and summary. For smaller teams, a shared Google Doc works fine.

One practical habit: include the timestamp link to the recording next to each action item. That way, if someone disputes what was agreed, they can go straight to the 34-minute mark and hear it for themselves. Both Zoom cloud recordings and Google Meet recordings allow timestamp-based links.

A Note on Consent Before Sharing Summaries

The recording itself has legal implications — covered earlier — but sharing an AI-generated transcript carries its own risks. If your meeting included confidential business information or personal data about individuals, uploading that audio to a third-party AI service like Otter.ai means their servers are processing it. Under GDPR, that counts as data processing, and you’d need to check whether the tool has a Data Processing Agreement in place.

Most enterprise-tier plans for Otter.ai, Fireflies.ai, and Fathom do offer DPAs. Free tiers typically don’t. Worth checking before you start feeding sensitive calls into any of these tools.

Legal and Privacy Considerations for Video Conference Recording (GDPR and Consent Laws)

Recording a meeting without thinking about consent is how companies end up facing complaints, lawsuits, or regulatory fines. This isn’t theoretical — it’s happened. Before you hit record on Zoom, Google Meet, Teams, Webex, or Zoho Meeting, you need to understand what the law actually requires in your situation.

Legal and Privacy Considerations for Video Conference Recording (GDPR and Consent Laws)

One-Party vs. Two-Party Consent

This distinction matters more than any platform setting.

  • One-party consent means only one person in the conversation needs to agree to the recording — and that person can be you. Most U.S. federal law follows this standard under the Electronic Communications Privacy Act. Practically speaking, if you’re on the call, you can record it without telling anyone else.
  • Two-party consent (more accurately called all-party consent) requires everyone in the conversation to agree. Twelve U.S. states currently enforce this, including California, Florida, Illinois, Pennsylvania, and Maryland. If you’re recording a call with someone in California and you’re in New York, California’s stricter law likely applies to that participant.

Outside the U.S., all-party consent is the norm rather than the exception. Canada, Australia, and most of the EU lean heavily toward requiring explicit consent.

When in doubt, treat every call like a two-party consent situation. It’s simpler and safer.

GDPR and What It Actually Means for Meeting Recordings

If you’re dealing with anyone based in the European Union, GDPR applies to your recording — even if your company is based in the U.S.

Under GDPR, a video recording of a meeting counts as personal data. That means you need a lawful basis to record and process it. The most common bases used in practice are:

  • Legitimate interest — you have a genuine business reason to record (training purposes, audit trail, etc.) and that interest isn’t outweighed by participants’ rights
  • Consent — you’ve explicitly asked participants and they’ve agreed
  • Contractual necessity — the recording is needed to fulfill a contract

Beyond collecting consent, GDPR also imposes obligations on what you do with the recording afterward. You need to store it securely, limit who can access it, define a retention period, and be able to delete it on request. If you’re storing cloud recordings through Zoom, Google Meet, or Microsoft Teams, check where those recordings are physically stored — some plans store data on servers in specific regions, which matters for GDPR compliance.

You also have to tell people you’re recording them before you do it. A notice in the meeting invite, a verbal announcement at the start of the call, or the platform’s built-in consent prompt all work. Don’t rely solely on the platform’s notification banner — it’s not guaranteed to satisfy your legal obligation in every jurisdiction.

Platform Consent Notifications

Most platforms handle basic notification automatically, but the scope varies.

  • Zoom shows a consent dialog to participants when a host starts recording to the cloud. Participants can accept or leave the meeting. For local recording, there’s no automatic participant prompt — the host has to handle that.
  • Google Meet doesn’t currently show a recording consent pop-up to participants. It sends an email notification to the meeting organizer, but that’s about it. You’re responsible for announcing the recording yourself.
  • Microsoft Teams displays an in-meeting banner and sends a notification in the chat that recording has started. It doesn’t require participants to actively consent — it just informs them.
  • Webex sends a notification when recording begins. The exact behavior depends on your organization’s admin settings, so verify this with your IT team before assuming it’s handled.
  • Zoho Meeting notifies participants when the host starts recording, and participants who join after recording has begun also get notified. Still — a verbal consent at the start of the meeting is always good practice regardless of what the platform does automatically.

Third-Party Recording Tools and Compliance

Using Otter.ai, Fireflies.ai, Fathom, or Tactiq introduces an additional layer of complexity. These tools often join the meeting as a bot participant. Depending on your jurisdiction and the platform you’re on, that bot’s presence and recording activity may or may not satisfy consent requirements.

Fireflies.ai, for example, joins as “Fireflies Notetaker” — visible to everyone in the meeting. Fathom operates similarly. The transparency helps, but visible presence isn’t the same as legal consent. If you’re using these tools on calls with EU-based clients or in all-party consent states, you should still explicitly announce that an AI tool is recording and get verbal acknowledgment.

Rev (for transcription) and Descript (for editing recordings) receive data you’ve already captured. The compliance obligation there falls on how you collected the recording in the first place and how you handle the data you send to those services. Check each tool’s data processing agreement — most reputable services offer a GDPR-compliant Data Processing Addendum (DPA).

OBS Studio and other local screen recorders don’t have any built-in consent mechanism at all. You’re entirely responsible for compliance when using them.

Practical Steps to Stay Compliant

Here’s a simple checklist worth following for every recorded meeting:

  1. Announce the recording at the start — say it out loud, or put it in the meeting invite. Both is better.
  2. Give participants a chance to opt out — if someone objects, you either stop recording or let them leave.
  3. Document consent — for important calls, a brief “everyone okay with this being recorded?” in the chat creates a written record.
  4. Set a retention policy — decide how long recordings are kept (30 days, 90 days, 1 year) and actually delete them when that period ends. Zoom and Teams both allow admins to set auto-deletion.
  5. Restrict access — don’t share the recording link publicly or with people who weren’t part of the meeting, unless there’s a clear reason.
  6. Check where data is stored — especially if you’re using cloud recording on Zoom or Microsoft Teams with international participants.

A Note on Employee Monitoring Laws

Recording internal meetings brings its own complications. Some countries — Germany is a notable example — have strict works council rules and employee privacy rights that can limit or restrict recording of staff meetings. Even in the U.S., recording employees without notice can create liability under state wiretapping statutes.

If you’re rolling out a policy of recording all internal meetings (for training, documentation, or AI summaries via tools like Otter.ai or Fireflies.ai), get your legal team to review it first. A blanket “all meetings are recorded” notice in your employee handbook, combined with a platform admin setting, is usually enough — but that setup needs to be deliberate, not assumed.

Always announce, always get acknowledgment, and always know where the file ends up.

Frequently Asked Questions (FAQ)

Can I record a video conference without the host’s permission?

It depends on the platform and your role. On Zoom and Webex, hosts can grant co-hosts or participants recording rights — without that, you’re blocked from the native recorder. On Google Meet, only the meeting organizer or someone in the same Google Workspace organization can record natively.

Your workaround options are third-party tools like OBS Studio, Loom, or your operating system’s built-in screen recorder. These capture whatever’s on your screen regardless of host settings. Just know this doesn’t bypass the legal side — you still need to comply with consent laws in your jurisdiction.

Does recording notify other participants automatically?

On most platforms, yes. Zoom shows a red recording indicator in the top-left corner and plays an audio announcement. Google Meet displays a banner notification. Microsoft Teams sends a notification in the meeting chat. Webex announces it verbally and visually.

These notifications are built in and can’t be disabled without third-party tools. That’s actually a good thing from a GDPR and consent standpoint.

What’s the difference between cloud recording and local recording?

Local recording saves the file directly to your computer. Cloud recording uploads it to the platform’s servers — Zoom, Webex, and Microsoft Teams all offer this. Cloud recordings are easier to share and accessible from anywhere, but storage is usually capped on free plans. Local recordings give you more control over file format and don’t eat into subscription limits.

For most people doing regular meetings, cloud recording is more convenient. If you’re recording sensitive content and have data residency concerns, local is safer.

Can I record a meeting on my iPhone or Android phone?

Yes, but with limitations. The Zoom, Google Meet, and Microsoft Teams mobile apps don’t offer in-app recording for most users — it’s either restricted to hosts with the right plan or unavailable entirely on mobile. Webex has mobile recording available on some enterprise plans.

Your practical option on both iOS and Android is the device’s native screen recorder. On iPhone, add it to your Control Center via Settings → Control Center → Screen Recording. On Android, swipe down and look for “Screen recorder” in your quick settings panel. Neither will separate audio tracks, but they’ll capture the full screen including video and system audio.

How long can I record a video conference?

There’s no hard time limit on most platforms for the recording itself — the meeting duration is the limiting factor. Zoom’s free plan caps meetings at 40 minutes for groups. Paid plans on Zoom, Teams, and Webex support hours-long sessions without interruption.

Cloud storage is where you’ll hit a ceiling faster. Zoom free accounts don’t include cloud recording at all. Google Meet recording on Google Workspace Essentials stores files in Drive, which is subject to your storage quota. Always check your available cloud storage before a long session.

Will my recording include the chat messages?

On Zoom, local recordings save a separate .txt file with the chat log if you’ve enabled it in settings. Cloud recordings include chat as a separate download. Microsoft Teams recordings don’t capture chat automatically, but the transcript is saved separately in the meeting details.

Google Meet and Webex don’t bundle chat into the recording file. You’d need to copy it manually or use a tool like Tactiq or Fireflies.ai that captures both audio and chat during the call.

What format are recorded meetings saved in?

Zoom saves local recordings as .mp4 (video) and .m4a (audio only). Microsoft Teams recordings are saved as .mp4 in SharePoint or OneDrive. Google Meet recordings go to Google Drive as .mp4. Webex also outputs .mp4. Zoho Meeting saves recordings in .mp4 as well.

Basically, you’re getting .mp4 across the board. That works with almost any video editor, including Descript if you’re doing transcription-based editing.

Can I get a transcript automatically from a recorded meeting?

Yes. Several tools do this well. Otter.ai and Fireflies.ai can join your meeting as a bot and produce a real-time transcript plus an AI meeting summary. Fathom is another option — it’s particularly good for sales calls and records, transcribes, and summarizes automatically.

If you already have the recording file, upload it to Descript or Rev for post-meeting transcription. Descript handles it with AI; Rev offers human transcription if accuracy is critical. Microsoft Teams has built-in transcription if your organization has the right Microsoft 365 license.

Is it legal to record a video conference without telling anyone?

This varies entirely by country and state. In the US, federal law requires one-party consent — meaning you can record a conversation you’re part of without notifying others. But 11 states, including California, Florida, and Illinois, require two-party (or all-party) consent. Recording without disclosure in those states can be a criminal offense.

Under GDPR in Europe, recording counts as data processing. You need a lawful basis, and simply hitting record without informed consent typically doesn’t qualify. For any meeting with participants across multiple jurisdictions, the safest approach is always to announce the recording at the start. It takes five seconds and protects you completely.

Can I record just the audio, not the video?

Yes. On Zoom, when you start a local recording, you can later find the .m4a audio-only file in the same folder as your .mp4. Some platforms let you choose audio-only recording in their settings. Alternatively, use a dedicated audio recorder or set OBS Studio to capture only your microphone and system audio sources without any video canvas.

If you just need the spoken content for transcription — not the visual — audio-only files are smaller and faster to process with tools like Otter.ai or Rev.

Why is my recorded meeting video blurry or low quality?

A few common causes. First, your internet bandwidth during the call affects quality — if the stream was pixelated live, the recording captures that same degraded feed. Second, Zoom and Teams compress recordings by default. Third, your local display resolution settings matter for screen-capture recordings.

To get better results: record locally rather than from the cloud when possible, make sure your connection is stable before the call starts, and if you’re using OBS Studio, set your output resolution to 1920×1080 and your bitrate to at least 2500 kbps. Also check your microphone setup — bad audio makes even a clean video feel low quality.

Conclusion — Recording Is Not Just a Backup, It Is a Productivity Tool

You started this guide probably wanting to know how to hit the record button on Zoom or Google Meet. But the bigger picture is worth sitting with for a moment.

A recording does more than save what was said. It becomes searchable documentation. It feeds into AI tools like Otter.ai, Fireflies.ai, and Fathom that turn a 60-minute call into a structured summary with action items in under two minutes. It gives your absent colleague the full context without anyone needing to write a 400-word recap email. It protects you legally when a client disputes what was agreed.

That’s not a backup. That’s a workflow.

The Habit Is More Important Than the Tool

Whether you’re on Zoom with cloud recording enabled, Google Meet with a Workspace account, Microsoft Teams, Webex, or Zoho Meeting — every platform covered in this guide can produce a usable recording. The technical barrier is genuinely low now. What separates teams that benefit from recording and teams that don’t is whether they’ve made it a consistent practice.

Record the meeting. Store it somewhere logical. Run it through a transcription tool. Share the summary. Done.

That loop, repeated consistently, replaces a lot of messy follow-up communication.

A Few Things to Carry Forward

Don’t ignore the legal side. GDPR in Europe, two-party consent states in the US, and similar laws in other jurisdictions aren’t edge cases — they apply to your next call. Announce the recording. Get acknowledgment. It takes ten seconds and it’s not optional.

If you’re not the host and can’t get recording access on your platform, tools like OBS Studio for desktop recording or Loom for quick screen capture exist and work. Riverside.fm is worth using if quality matters for something that’ll be published. These aren’t workarounds — they’re legitimate tools.

Mobile recording on Android and iPhone has real limitations. Built-in screen recorders work for personal use, but they’re not a substitute for proper host-side cloud recording when the meeting matters.

Where to Go From Here

Pick one thing to implement this week. If you’ve never recorded before, start with cloud recording on whatever platform your team already uses. If you already record but the files just sit in a folder, connect one of those recordings to Otter.ai or Fireflies.ai and see what an AI meeting summary actually looks like. If you’re editing recordings for training or client deliverables, spend an hour in Descript — it changes how you think about meeting content.

The tools are there. The process is straightforward. The only remaining question is whether you treat your meeting recordings as something worth using, or just something worth storing.

Use them.

Leave a Comment

Your email address will not be published. Required fields are marked *

Shopping Cart
Scroll to Top