Picture this: you are three weeks out from your conference, the venue is booked, the speakers are confirmed, and you sit down to place the badge printing order. You open the template, and the dropdown asks you to choose a size. Suddenly, you are staring at a list of dimensions — 4×3 inch, 4×6 inch, A7, A6, 74x105mm — and you realize you have no idea which one is right. Order too small and attendees will squint at each other’s chests trying to read a name. Order too large and the badge flops awkwardly on the lanyard, catches every breeze in the room, and makes everyone look like they are wearing a small sandwich board. It is exactly the kind of decision that feels minor until you get it wrong.
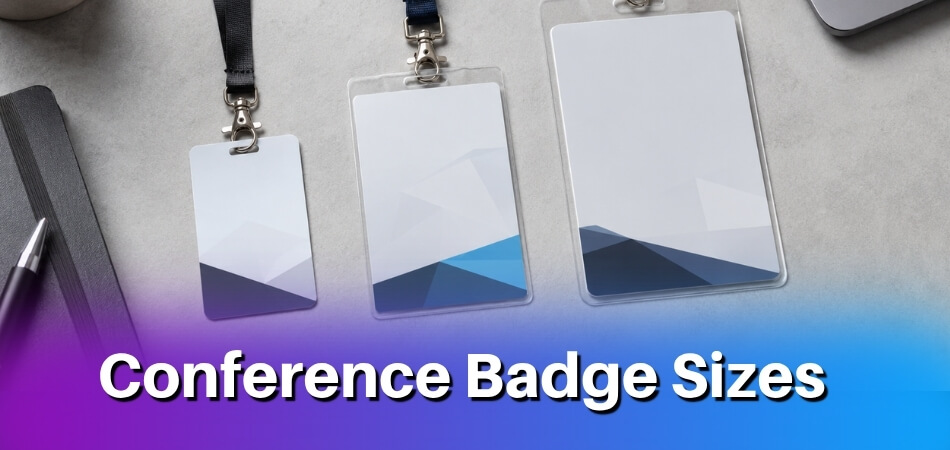
The short answer: the standard conference badge size in the United States is 4×3 inches, while the UK equivalent is A7 (74x105mm). When you need to display additional information — schedule details, a QR code, sponsor logos, or session tracks — a 4×6 inch badge (US) or A6 badge (UK) is the go-to upgrade. Regardless of size, minimum body text should sit at 24pt, with first names printed at 72pt so they are legible from roughly 15 feet (2–3 meters) away. Always use a sans-serif font such as Arial or Helvetica — they hold up under the print resolution demands of badge printing and stay sharp even at high DPI on a custom badge printer.
This guide covers everything you need to make a confident decision before you click order. You will find a full size comparison across US and UK standards, guidance on which size suits different event types from trade shows to hybrid events, font and design rules, how badge size affects lanyard and badge holder compatibility, what a slot punch has to do with it all, printing costs broken down clearly, accessibility best practices, and eco-friendly choices like recycled and biodegradable badges. By the end, you will know exactly what to order — and why.
The Quick Answer: Standard Conference Badge Sizes at a Glance
Most conference badges fall into one of two standard sizes depending on where you’re based.
In the US, the default is 4×3 inches (landscape orientation). That’s what you’ll find pre-loaded in most badge holder packs and what Eventbrite’s badge printing defaults to. The 4×6 inch badge is also common — typically used for trade shows or VIP events where you need more real estate for a logo, role title, or QR code.
In the UK and Europe, the equivalent standards are A7 (74x105mm) in portrait and A6 for larger badges. A7 is roughly the same footprint as a 4×3 inch badge, just with slightly different proportions.
Here’s a quick reference:
| Region | Standard Size | Common Use |
|---|---|---|
| US | 4×3 inch | General conferences, corporate events |
| US | 4×6 inch | Trade shows, expo floors |
| UK/EU | A7 (74x105mm) | General conferences |
| UK/EU | A6 | Trade shows, larger events |
Why Size Actually Matters
It’s not just about aesthetics. The wrong badge size causes real problems.
Too small and your 24pt font for the name becomes unreadable from a metre away. Too large and the badge flops over on the lanyard, hiding the printed side against someone’s chest. Both are annoying. Both happen constantly at events that skipped this decision.
The 4×3 inch badge hits a practical sweet spot — wide enough to hold a readable name printed at 72pt, a company name at 24pt, and still leave room for a QR code without everything feeling cramped. A sans-serif font like Arial or Helvetica at those sizes reads cleanly even on a low-DPI office print run.
If you’re ordering pre-punched stock, double-check whether the slot punch position matches your badge holder’s clip gap. A 4×3 badge punched for a top-load holder won’t sit right in a side-load clip. Small detail. Worth five seconds to verify before you print 500 of them.
Most Common Conference Badge Sizes — US vs UK Breakdown
4×3 Inch Badge (US Standard)
The 4×3 inch badge is what most North American event organizers default to, and for good reason. It fits cleanly into the plastic badge holders you’ll find at every trade show supply vendor, slots straight onto a standard lanyard, and gives you enough room to print a name at 72pt without things looking cramped.
Most pre-cut badge stock at US print shops is sized for this format. If you’re ordering through a service like Eventbrite’s badge printing integration or a dedicated custom badge printer, the 4×3 template is usually pre-loaded. You won’t have to fiddle with custom dimensions.
Practically, this size works for:
- Single-day corporate conferences
- Trade show badges where attendees wear them all day
- Events where you want room for a QR code alongside the name
One thing to watch: portrait orientation (3 inches wide, 4 tall) versus landscape (4 wide, 3 tall). Landscape is the US default. It sits better on a lanyard and keeps the name readable at eye level without the badge flipping.
If you’re using a slot punch to add a lanyard hole yourself, punch at the top-center on the 4-inch edge. That’s it.
A7 Badge / 74×105mm (UK Standard)
In the UK and much of Europe, the A7 size — 74×105mm — is the rough equivalent of the US 4×3. It’s slightly taller and narrower. The dimensions map to the ISO A-series paper system, which makes sense if your print shop works in millimeters and your badge holder supplier is European.
74×105mm badge holders are stocked at most UK office supply chains. They fit a standard lanyard clip without modification.
The practical difference from a US 4×3? About 4mm narrower and 2mm taller. Most people won’t notice. Your design will need minor adjustments if you’re adapting a US template — mainly some horizontal padding tweaks. Font sizes don’t need to change.
One thing that does matter: DPI settings. Whether you’re printing A7 in the UK or 4×3 in the US, you want print resolution at 300 DPI minimum. Anything lower and Arial or Helvetica at 24pt starts to look soft at the edges on glossy badge stock.
4×6 Inch and A6 — When You Need More Space
Sometimes the standard size just isn’t enough. A 4×6 inch badge (US) or A6 — 105×148mm — (UK/EU) doubles your printable area. These are genuinely useful in specific situations.
Think multi-day conferences where you’re printing a schedule on the badge. Or trade show badges that need a QR code, the attendee’s name, job title, company, and a session track — all readable without squinting. A6 handles all of that without the layout feeling squeezed.
The trade-off is weight and movement. A 4×6 badge in a badge holder is noticeably heavier, especially with a rigid plastic holder. On a lanyard, it swings more. Some attendees find it annoying by hour three.
A few practical notes:
- If you’re going for A6, check that your badge holder supplier actually stocks A6 — some only carry A7 and A5, skipping A6 entirely
- 4×6 badge stock is also the same size as a standard postcard, which means your local print shop can almost certainly run it without custom setup fees
- Recycled badge and biodegradable badge options are more widely available in A6/4×6 than smaller sizes — partly because sustainable badge manufacturers tend to cater to larger events where the format is more common
Hybrid event badge designs sometimes use 4×6 because there’s enough room to include both a physical QR code and a printed virtual session link — handy when attendees are moving between in-person rooms and online streams.
If you genuinely need this size, use it. But if you’re picking it because it feels more premium, the 4×3 or A7 will do everything you actually need.
What Is a 38mm Badge? Size, Use Cases, and When to Choose It
A 38mm badge is a circular or square button-style badge — roughly 1.5 inches across. That’s small. Smaller than a business card, smaller than your thumb. It’s the kind of badge you pin to a lanyard, a jacket lapel, or a tote bag rather than wear as your primary identification.
![]()
To put it in context: a standard conference badge is either a 4×3 inch badge or an A7 badge (74x105mm). A 38mm badge is a fraction of that.
What It’s Actually Used For
At conferences, 38mm badges show up in a few specific situations:
Role or tier identification. You’ll see them clipped alongside a full name badge to flag someone as a speaker, sponsor, VIP, or volunteer. The main badge holder carries all the text; the 38mm button just signals status at a glance.
Pronoun indicators. A lot of events now hand these out at registration so attendees can self-select without any fuss.
Gamification and event swag. Some organisers use them as collectible stamps — scan a QR code at a booth, get a badge. It adds an engagement layer without printing hundreds of extra full-size badges.
Dietary or access flags. Catering staff can spot a red 38mm pin faster than they can read a lanyard badge.
What You Cannot Put on a 38mm Badge
Not a name. Not a company. The usable print area at 38mm is roughly 30mm once you account for the button edge and safe zone. At 300 DPI — the minimum print resolution for sharp results — you’re working with about 355 pixels of diameter. That’s enough for an icon, a short word, or a solid colour with a logo. That’s it.
If someone tells you they want their full name, title, and company printed on a 38mm badge, push back. Even at 24pt font — the smallest most accessibility guidelines recommend for name badges — you’re fitting maybe three short words before you run out of room. At 72pt, you get one word. The math doesn’t work.
Practical Notes Before You Order
38mm badges almost always use a pin-back mechanism, not a slot punch. That matters if you’re planning to attach them to a badge reel or clip them onto a standard conference badge — you’ll need to think about how the two attach together without damaging the main badge.
If sustainability is on your brief, 38mm recycled badge or biodegradable badge options are easy to find. The small size means low material cost, so going eco here usually adds very little to your total budget.
One more thing: Eventbrite and most self-service badge platforms don’t include 38mm in their standard templates. You’ll almost certainly need a custom badge printer for these, or order them pre-made through a promotional products supplier rather than a standard print-on-demand service.
Use them as a complement. Never as a substitute.
Choosing the Right Badge Size by Event Type
The size that works brilliantly at a 20-person networking breakfast will look lost at a 3,000-person trade show. Event scale and context should drive your badge decision more than anything else.
Small Meetups and Networking Events
For gatherings under 100 people — think local meetups, workshop days, or informal industry lunches — a 3×4 inch badge or the UK equivalent A7 (74x105mm) is usually the right call. These events run on conversation. People are close together, introductions happen fast, and nobody needs to read your name from across a room.
Keep the design simple. Name in 24pt font minimum, company underneath in something smaller. Arial or Helvetica at these sizes stays clean and readable without fussing with custom typography. A basic badge holder on a lanyard works fine — no need for anything elaborate.
One practical note: at small events, badge reels are genuinely useful. Attendees end up scanning QR codes, showing credentials, or handing the badge over briefly. A badge reel means they’re not unclipping anything.
Mid-Size Corporate Conferences
This is the 100–1,000 attendee range — the bread and butter of most corporate event planners. The 4×3 inch badge (landscape orientation) dominates here, and for good reason. It sits comfortably in a standard badge holder, hangs well on a lanyard, and gives you enough real estate for a name, title, company, colour-coded attendee tier, and a QR code without everything feeling cramped.
Print at 300 DPI minimum. Anything below that and company logos start looking soft when you’re standing two feet away from someone. If you’re using Eventbrite or a similar registration platform to generate badges on the fly, double-check their export resolution settings — some default lower than you’d expect.
Font size matters more than people think. The name should hit 36pt to 48pt at minimum. Smaller than that and you’re forcing people to squint, which defeats the whole point. Stick with a clean sans-serif font throughout.
Large-Scale Conventions and Trade Shows
Scale changes everything. At a convention with thousands of attendees, you need badges that communicate fast — from a distance, in a noisy hall, while someone is walking toward you at speed. The 4×6 inch badge or A6 format is the standard here, and it’s worth paying attention to why.
More space means a much larger name. 72pt font for the name is not excessive at this scale — it’s practical. Trade show exhibitors especially benefit from oversized text because they’re identifying potential leads in real time, often from 10 feet away across a crowded aisle.
These events also tend to have multiple badge types: exhibitor, press, speaker, attendee, sponsor. Colour-coding across badge tiers is standard practice, and the larger format gives you room to make those distinctions obvious without shrinking the name to fit everything in.
If you’re running thousands of badges, look at a custom badge printer setup or a print partner who supports slot punch finishing — it keeps production consistent and means your badge holders clip correctly every time.
For outdoor conventions or multi-day events, biodegradable badge stock is worth the small cost premium. Recycled badge materials have become a standard ask from corporate clients, and the print quality on most recycled options is now on par with virgin stock.
VIP and Executive Events
VIP events are a different calculation entirely. The headcount is usually small, but the expectation of quality is high. A 4×3 inch or A7 badge in a premium format — think thick card stock, spot UV, or engraved acrylic — communicates something that a standard print-on-demand badge doesn’t.
Size-wise, VIP badges often go slightly smaller rather than larger. The logic is that these events are intimate. Everyone knows who the key people are. A discreet, well-printed badge signals exclusivity better than a large billboard hanging around someone’s neck.
Lanyards matter more here too. A thin, cheap lanyard undercuts an otherwise polished badge. Go with a woven or satin lanyard in a brand colour, and consider a magnetic badge holder instead of a clip — they sit flatter and don’t damage clothing, which executives tend to appreciate.
If the event includes a digital component — a hybrid event badge with an embedded QR code linking to a digital profile or session check-in — make sure the QR code is large enough to scan reliably. A QR code below 2cm square tends to cause friction, which is the last thing you want at an executive dinner.
Lanyard Compatibility — Does Your Badge Size Actually Fit?
Getting the badge size right is only half the job. If your badge doesn’t fit the lanyard hardware properly, you’ll have delegates walking around with twisted, drooping, or illegible badges all day.
Standard Lanyard Slot Dimensions and Badge Hole Placement
Most standard lanyards terminate in one of three ways: a bulldog clip, a swivel hook, or a slot attachment. The slot type — where the lanyard end feeds directly through a punched hole in the badge or badge holder — is the most common at conferences.
The standard slot punch creates an opening of roughly 4mm x 20mm. That’s the industry default, and virtually every badge holder and pre-punched badge on the market is built around it. If you’re printing on card stock and punching it yourself, use a slot punch rather than a hole punch. A round hole might look fine on day one, but it tears under the weight of a lanyard by mid-afternoon.
Hole placement matters too. The standard position is centered horizontally, 6mm from the top edge. Going closer than 5mm risks tearing; going lower starts eating into your design space. If your badge has a QR code near the top, check that positioning before you go to print — it’s an easy conflict to miss.
For badges in a badge holder rather than printed directly, the holder takes the punch, not the badge itself. This gives you more flexibility with design, but you still need to confirm the holder dimensions match your badge size before ordering in bulk.
Which Badge Sizes Work Best with Which Lanyards
The 4×3 inch badge (the most common US conference badge) fits cleanly into a standard horizontal badge holder with a single top-slot attachment. It sits stably on a lanyard without flipping, which is why it’s the default for trade shows and corporate events. Pair it with a badge reel if attendees need to scan in and out of sessions.
The 4×6 inch badge is heavier and larger. A single slot can work, but two slots — one on each side of the top edge — distribute the weight better and stop the badge rotating. If you’re using a single-slot lanyard with a 4×6, expect it to flip constantly.
UK-standard A7 badges (74x105mm) are close in size to the 4×3 inch format and behave similarly on lanyards. No real issues there. The A6 badge is bigger — 105x148mm — and runs into the same weight problem as the 4×6 inch. Two-point attachment or a reinforced badge holder is the practical fix.
The 38mm badge — the small circular pin badge — doesn’t use a lanyard at all. It pins directly to clothing. Don’t try to rig it onto a lanyard; it’s not built for that and it looks improvised.
One thing people overlook: lanyard width affects how the badge hangs. A 10mm lanyard with a lightweight A7 badge works fine. Put a thick 20mm woven lanyard on a 4×3 inch badge holder and the extra weight and stiffness can cause the whole thing to sit at an awkward angle. Test the combination before your event, not the morning of.
Font Size and Design Rules for Readable Conference Badges
Getting the size right is only half the job. A perfectly sized badge with tiny, poorly chosen text is still useless at six feet away.
![]()
Minimum Font Size Guidelines — The 24pt and 72pt First Name Rule
There’s a rough industry standard that most experienced badge designers follow: the first name should be printed at no smaller than 72pt. That sounds large, but it’s about right for a 4×3 inch badge when you want someone’s name readable from across a handshake distance.
Everything else — job title, company name, pronouns — drops down from there. A job title at 24pt is generally the floor. Go smaller and you’re printing text that people have to physically lean in to read, which defeats the whole point.
Here’s a simple hierarchy that works well in practice:
- First name: 72pt minimum
- Last name: 36–48pt (slightly smaller than first is fine)
- Company/title: 24pt minimum
One thing people consistently get wrong is trying to fit too much on the badge. A name, a company, and maybe a role. That’s it. If you’re adding a mailing address or a three-line job description, you’ve already lost.
Print resolution matters here too. Text set at 72pt looks clean on screen but blurry in print if your file isn’t set to at least 300 DPI. Always set up badge artwork at 300 DPI before you send it to a custom badge printer. Anything lower and sharp letterforms start to soften at the edges.
Best Fonts for Badge Readability — Sans-Serif, Arial, and Helvetica
Serif fonts have their place. Conference badges aren’t it.
At small sizes and fast-read distances, serifs add visual noise. Sans-serif fonts strip that away. Arial and Helvetica are the two defaults that professionals keep coming back to because they’re neutral, widely available, and genuinely legible in print.
Helvetica is slightly more refined — it’s a common choice for trade show badges where the overall design is polished. Arial is functionally identical for most print purposes and comes standard in every design tool and word processor on earth. Either one works.
Other solid options worth knowing: Futura, Myriad Pro, and Open Sans (which is free via Google Fonts). All three are clean sans-serif fonts that hold up well when printed on a 4×3 inch badge or a wider A6 badge layout.
What to avoid: script fonts, condensed fonts set too small, anything with thin strokes under 18pt. Thin strokes collapse in print, especially on recycled or biodegradable badge stock, which tends to have a slightly rougher surface texture that bleeds ink a little more than coated card.
One practical note — if you’re pulling attendee data from a platform like Eventbrite and auto-populating badge templates, test the font with long names before you print a full run. A name like “Bartholomew Worthington” at 72pt will overflow a standard 4×3 badge field without word-wrap rules in place.
Adding QR Codes to Badges — Space Requirements and Sizing
QR codes are increasingly standard, especially on hybrid event badges where on-site check-in links to a digital attendee profile.
The minimum printable size for a scannable QR code is roughly 2×2 cm (about 0.8 x 0.8 inches). Go smaller and most phone cameras struggle to lock on, particularly in dim conference hall lighting. For comfortable scanning, aim for at least 2.5×2.5 cm.
On a 4×3 inch badge, that’s a meaningful chunk of space. The most common layout puts the QR code in the bottom-right corner, below the name and title block. This keeps the name prominent and the QR code accessible without the two competing visually.
On a smaller format — say, a 74x105mm (A7) badge — fitting a QR code without shrinking the name text is genuinely tight. In those cases, some designers move the QR code to the reverse side of the badge, which works fine as long as your badge holder is open on both sides and the lanyard setup lets attendees flip it.
A few things to check before print:
- Quiet zone: QR codes need a white margin around them (the “quiet zone”) of at least 4 modules wide. Without it, scanners fail even at proper sizes.
- Contrast: Black QR on white background. Avoid printing QR codes on coloured backgrounds unless you’ve tested scan rates — dark colours behind a QR code kill reliability fast.
- DPI again: QR codes at 300 DPI minimum. At 72 DPI, the module edges blur and the code becomes unscannable.
If you’re using a slot punch to fit the badge into a holder, double-check that the punch position doesn’t cut into the QR code area. It’s a surprisingly common mistake on A7 and 38mm badge formats where space is already limited.
Badge Size in Pixels — What You Need to Know for Print and Digital Files
Most badge designers trip up here. They build a file at screen resolution, send it to the printer, and get back something blurry and soft. The fix is simple once you understand how DPI works for badge printing.
DPI Basics for Badge Files
Print resolution should be 300 DPI minimum. That’s the standard for sharp text and clean logo edges. Some custom badge printer services ask for 350 or 400 DPI — always check the spec sheet before you start designing.
Screen resolution (72 DPI or 96 DPI) is for monitors. If your file is set to 72 DPI, it’ll look fine on screen and print terribly. Don’t use it.
Pixel Dimensions for Common Badge Sizes
Here’s how the standard sizes translate into pixels at 300 DPI:
| Badge Size | Inches | Pixels at 300 DPI |
|---|---|---|
| Standard US portrait | 4×3 in | 1200 × 900 px |
| Large event badge | 4×6 in | 1200 × 1800 px |
| A7 (UK standard) | 74×105 mm | 874 × 1240 px |
| A6 (UK large) | 105×148 mm | 1240 × 1748 px |
Those A7 and A6 pixel numbers assume 300 DPI. If your printer wants 350 DPI, multiply accordingly — a 74×105mm badge becomes roughly 1020 × 1449 px.
Calculating It Yourself
The formula is straightforward:
Pixels = (size in inches) × DPI
For millimetres, convert first: divide mm by 25.4 to get inches, then multiply by your DPI. So a 74mm wide badge at 300 DPI = (74 ÷ 25.4) × 300 = 874 pixels.
File Format Matters Too
PDF is the preferred format for most professional print runs. It preserves vector elements — meaning your text and logo stay crisp at any size. PNG at 300 DPI works fine for raster artwork. Avoid JPEG for badge files; compression artifacts show up on printed text edges, especially with QR codes.
Speaking of QR codes — if your badge includes one, generate it at a minimum of 500×500 pixels and embed it as a vector or high-resolution PNG. A pixelated QR code that won’t scan is a real problem at a 500-person conference.
Digital and Virtual Badge Files
Virtual event badges and hybrid event badge formats are a different situation. These are displayed on screen, so 72–96 DPI at a reasonable pixel dimension is fine. A typical virtual badge runs around 600×400 px or 800×600 px — wide enough to read clearly on a video call background or an Eventbrite event page profile.
If you’re exporting a design for both print and digital use, keep your master file at 300 DPI and export a downscaled version for digital. Never go the other direction — scaling up a low-res file destroys quality.
One Thing to Check Before You Export
Bleed. Most badge printers want 3mm of bleed on all sides — that’s extra background extending beyond the cut line so there’s no white edge if the cut shifts slightly. Build it into your canvas from the start. A 4×3 inch badge with 3mm bleed becomes a 4.24×3.24 inch canvas (add 0.118 inches per side). Easy to miss, annoying to fix at the last minute.
Accessibility Considerations in Conference Badge Design
Most event planners think about accessibility in terms of ramps and hearing loops. Badge design rarely gets the same attention. It should.
![]()
A badge that nobody can read is a failed badge — and it’s more common than you’d think.
Font Size Is the Obvious One, But Not the Only Thing
You’ve probably already read that 24pt is the minimum for names and 72pt is roughly where you’d cap large display text. But font choice matters just as much as size. Arial, Helvetica, and other clean sans-serif fonts are significantly easier to read for people with low vision or dyslexia compared to decorative scripts or condensed typefaces.
Avoid light font weights on pale backgrounds. A 24pt name printed in thin grey on white looks elegant on screen and invisible in a crowded hallway.
High contrast is non-negotiable. Black text on white, or white text on dark solid backgrounds. Check your badge design against WCAG contrast ratio guidelines — aim for at least 4.5:1 for body text. Free tools like WebAIM’s contrast checker take about 30 seconds to use.
Badge Orientation and Stability
A 4×3 inch badge in a standard badge holder worn on a lanyard will rotate. Almost every lanyard setup does this — the badge flips face-down the moment someone leans forward or moves quickly through a room. For attendees with mobility limitations who can’t easily flip a badge back over, or for anyone trying to read another person’s name quickly, this is a real problem.
Some practical fixes:
- Use a badge reel with a clip attachment instead of a lanyard slot — this keeps the badge face-forward
- A slot punch with two horizontal slots at the top (rather than one centered) significantly reduces rotation
- Magnetic badge holders eliminate the rotation problem entirely and are easier for people who can’t easily clip or pin things to clothing
QR Codes and Low Vision
QR codes are useful for lead retrieval, session check-in, and digital contact sharing. But if the QR code takes up half the badge face, you’ve made the name harder to read for everyone. Keep the QR code to one corner, sized roughly 1×1 inch. That’s plenty for any standard scanner.
Don’t rely on QR codes as the only identifier. Attendees with smartphones that don’t scan reliably, or those using older devices, shouldn’t be left without a functional credential.
Pronoun Fields and Name Legibility
More conferences are including pronoun fields on badges now. That’s good practice. Just make sure the pronoun text doesn’t compete visually with the name. Use a noticeably smaller size — around 14-16pt — in a secondary colour or weight, positioned clearly below the name.
The name should still dominate. Every time.
Recycled and Biodegradable Badge Materials
Recycled badges and biodegradable badge stock have improved significantly. The accessibility issue with some eco materials is texture and print quality. Certain recycled paper stocks don’t hold ink as sharply, which can reduce contrast and edge definition on text — particularly noticeable if you’re printing at anything below 300 DPI.
If you’re going with an eco option, request a print proof before ordering the full run. Check it in natural light. If the name looks slightly fuzzy or low-contrast on the physical proof, either switch stock or increase the font weight.
Virtual and Hybrid Event Badges
Virtual event badges — the kind used in Eventbrite-integrated platforms or custom badge printer systems for hybrid events — have their own accessibility layer. On-screen badges should still follow contrast and font size rules. If you’re displaying a hybrid event badge in a video call or digital lobby, text needs to remain readable at thumbnail scale.
Some hybrid platforms let you set badge display size. Don’t let it default to something illegible. A name that reads fine at 400px wide becomes unreadable at 80px in a grid view.
A Simple Checklist Before You Print
Before sending a badge design to a custom badge printer, run through this:
- Is the name at least 24pt in Arial, Helvetica, or comparable sans-serif?
- Does the text pass a 4.5:1 contrast ratio check?
- Is the badge holder or attachment method rotation-resistant?
- Is the QR code secondary to the name, not competing with it?
- If using recycled stock, have you physically checked a proof?
Five minutes on this saves you the embarrassment of 400 unreadable badges on the morning of your event.
Eco-Friendly and Sustainable Badge Options by Size
Sustainability is showing up in conference planning conversations a lot more than it used to. And badge materials are a surprisingly easy place to make a real difference — especially if your event has hundreds or thousands of attendees.
The good news is that recycled and biodegradable badges are now available in all the standard sizes. You’re not being forced into an awkward custom dimension just to go green.
Recycled and Biodegradable Materials by Format
For the standard 4×3 inch badge and the UK equivalent A7 (74x105mm), recycled card stock is the most common eco swap. Most custom badge printers — including Avery, Moo, and GreenBadge — offer 350gsm recycled card in these sizes without any upcharge on the template dimensions. Print resolution and DPI requirements stay identical to regular stock, so your existing artwork files work fine.
Biodegradable badge holders are trickier. Most traditional badge holders are PVC, which doesn’t break down. Alternatives exist in PLA (corn-based plastic) and recycled PET, but stock availability varies. Check lead times — these often need 3–4 weeks rather than the standard 5–7 days.
For larger formats like the 4×6 inch badge or A6, seed paper is worth considering. It’s thick enough to stay rigid in a lanyard, and attendees can plant it after the event. The weight of seed paper (usually around 300gsm) means your slot punch cuts cleanly and the lanyard hole holds without tearing — something thinner eco papers sometimes fail at.
The 38mm Badge Problem
The 38mm badge — that small circular or square pin-back format — is where sustainability options are thinnest. The base is usually a plastic shell. Some suppliers now offer recycled aluminium shells, which is genuinely better, but fully biodegradable 38mm badges are still rare. If zero-waste is a hard requirement for your event, this is the format to avoid.
Lanyards and Badge Reels
Don’t overlook the lanyard itself. A recycled card badge hanging from a virgin polyester lanyard isn’t a particularly coherent sustainability story. Bamboo lanyards, recycled PET lanyards, and organic cotton options all work with standard badge holder clips. The fitting dimensions haven’t changed — a standard 10mm strap width still threads through the same badge holder slot you’d use with any other lanyard.
Badge reels are harder. Most are ABS plastic. If your event uses badge reels for security or access reasons, recycled ABS options exist but you’ll need to source them from specialist suppliers rather than through Eventbrite’s badge printing integrations or standard print-on-demand services.
QR Codes on Eco Badges
One thing that genuinely helps with waste reduction is putting a QR code on the badge instead of printing a full schedule, map, or sponsor list on a separate insert. A 4×3 inch or A7 badge has enough real estate for a QR code, name, title, and company — printed at 300 DPI on recycled stock — without cramming anything in. That one change eliminates a lot of paper from the attendee pack entirely.
Keep the QR code at least 25mm x 25mm so it scans reliably. Smaller than that and you’ll get complaints at the door.
Virtual and Hybrid Events
Virtual event badges and hybrid event badges don’t have a physical footprint at all, which is the most sustainable option by default. These are typically a designed graphic — same proportions as a physical badge, often 4×3 inches at 72–96 DPI for screen display — used in video call backgrounds, social media frames, or event apps. No printing, no lanyard, no waste. If your event has a significant virtual component, leaning into digital-only badges for remote attendees while reserving physical recycled badges for in-person attendees is a practical middle ground.
Practical Ordering Notes
When ordering recycled or biodegradable badges, always request a physical sample before bulk printing. Eco card stock can behave differently under inkjet vs. laser printing, and some recycled papers have a slight texture that affects how fine detail (like small sans-serif fonts in Arial or Helvetica at 24pt) renders. A proof run of 10–20 badges costs almost nothing and saves you from a batch of 500 that look muddy.
Pricing for recycled stock typically runs 10–20% higher than standard card. Biodegradable holders add more. Budget accordingly — but for most events, the per-badge cost difference is under £0.30 or $0.40, which is negligible against total event spend.
Badge Sizing for Virtual and Hybrid Events
Virtual events changed a lot of assumptions about badges. You’re no longer designing for a lanyard and a badge holder — you’re designing for a screen, often a small one, sometimes shared in a video thumbnail or a Zoom grid view.
Virtual Event Badges Are a Different Animal
There’s no standard size for virtual event badges the way there is for physical ones. Most platforms generate them as digital cards, profile overlays, or downloadable images. Eventbrite, for example, lets attendees download a digital badge after registration — these are typically exported as square or near-square images, usually around 500x500px to 1000x1000px.
That’s a completely different aspect ratio from the 4×3 inch badge that dominates physical conferences. Design files built for print won’t translate cleanly to a digital badge without a redesign.
Keep the layout simple. A name, a job title, maybe a company logo. QR codes on virtual badges are actually useful here — attendees can embed a link to their LinkedIn or a contact card, and other people can scan it directly from their screen.
Font rules still apply, though. You still want a sans-serif font like Arial or Helvetica. The difference is you’re optimising for screen pixels, not DPI. Aim for high contrast — dark text on light background — because screens vary wildly in brightness calibration.
Hybrid Events: You’re Designing Two Badges
This is where it gets complicated. Hybrid events have in-person attendees and remote ones attending simultaneously. The temptation is to design one badge and use it for both. That rarely works well.
Your physical badge still needs to fit a standard badge holder, work with a lanyard, and be readable from arm’s length — so you’re back to the 4×3 inch or A7 (74x105mm) format. Your virtual badge needs to work on screen, often at smaller display sizes in video calls.
The cleanest approach is to treat them as two separate deliverables with shared branding. Same colours, same logo placement, same font choices — but different dimensions and layout decisions for each format.
QR Codes on Virtual Badges
A QR code on a physical trade show badge is mostly there for lead capture. On a virtual event badge, it does something slightly different — it acts as a direct link people can share in chat windows, embed in email signatures, or display during a video presentation.
Size the QR code so it’s at least 150x150px in the final exported image. Anything smaller and it may not scan reliably from a screen. Test it on your phone before distributing to attendees.
What Platforms Actually Output
Most virtual event badge generators spit out a PNG or JPEG, not a print-ready PDF. That’s fine — they’re not meant for print. But if you’re running a hybrid event and want some consistency, make sure your custom badge printer is working from the correct file for the physical version, separate from whatever the platform generates digitally.
Don’t assume the file Eventbrite or any other platform produces is suitable for printing at 300 DPI. It usually isn’t. Build your print files independently, then match the digital aesthetic to them.
Cost Comparison — How Badge Size Affects Your Printing Budget
![]()
Per-Unit Cost by Size — Small vs Standard vs Large
Size moves the needle on cost more than most organizers expect.
A small 38mm button-style badge is cheap to produce — typically $0.15 to $0.40 per unit at volume — but you’re usually buying them pre-made without custom printing, which limits what information you can actually put on them. Good for branded pins. Not great for name identification at a 500-person conference.
The 4×3 inch badge is the sweet spot for cost and function. At a mid-volume run of 250–500 units, expect to pay roughly $0.50 to $1.20 per badge, depending on stock weight, whether you’re using a badge holder separately, and how many ink colors you’re printing. Full-color printing on heavier card stock pushes that toward the higher end.
Step up to a 4×6 inch badge — or its metric near-equivalent, the A6 badge at 105x148mm — and per-unit costs climb to $1.50–$3.00 at similar quantities. You’re paying for more material, more ink coverage, and often a bigger badge holder or reinforced slot punch if you’re adding a lanyard slot. The A7 badge at 74x105mm sits in between, usually $0.80–$1.50 per unit.
A few things that affect cost regardless of size:
- DPI and print resolution — printing at 300 DPI is standard for professional output. Files submitted at 72 DPI will either get rejected or come back blurry. Either way it costs you time.
- Finishing — a slot punch adds a few cents per badge but is essential if you’re using lanyards and not pre-punched holders.
- Eco-materials — recycled badge stock and biodegradable badge options add 20–40% to the per-unit cost depending on the supplier. Worth budgeting for if sustainability is part of your event brand.
- Quantity breaks — most printers drop price significantly at 500, 1,000, and 2,500 units. If you’re close to a break point, it’s often cheaper to order slightly more than you need.
For small events under 100 attendees, printing in-house on a laser printer with pre-cut badge inserts is genuinely the most cost-effective route. The quality is fine for a 4×3 inch insert slotted into a rigid badge holder. No minimum orders, no setup fees.
Where to Print — Eventbrite Integrations and Custom Badge Printers
Your printing options basically fall into three categories: through your event platform, through a specialist badge printer, or in-house.
Eventbrite has built-in badge printing support that works with specific compatible printers — notably the Dymo LabelWriter series and the Brother QL range. If you’re already using Eventbrite for ticketing and check-in, this is the lowest-friction path. You design within their badge editor, map attendee fields, and print directly at the door. The size flexibility is limited, though. You’re largely working within whatever label stock fits your printer model.
For anything more custom — specific dimensions like 74x105mm, branded card stock, full-bleed color — you’ll want a dedicated custom badge printer. Suppliers like GoBadge, Name Tag Wizard, Avery (for DIY templates), and PrintingForLess handle professional runs with full-size control. Upload your design as a PDF at 300 DPI, specify your cut size, and choose your stock.
If you’re running a hybrid event, some of these suppliers now produce virtual event badge designs alongside physical ones — essentially a consistent digital graphic that remote attendees display on screen, matched to the physical badge design. It’s a minor detail but it matters for brand consistency across your audience.
Badge reels are worth mentioning here too. If your event runs multiple days and attendees need quick access to their badge for scanning — QR code check-ins are common — a badge reel attachment is more practical than a fixed lanyard. Most standard badge holders have a slot or clip point that accommodates them, and they add $0.30–$0.80 per unit to your budget.
Always order 10–15% more badges than your confirmed headcount. Walk-ins happen. Badges get damaged. Running out on day one because you ordered to exact capacity is an easily avoidable problem.
Frequently Asked Questions
What is the most common conference badge size?
In the US, the 4×3 inch badge is the standard. Most badge holders, lanyards, and pre-cut inserts are built around it. In the UK and Europe, A7 (74x105mm) is the closest equivalent and just as widely used. If you’re ordering without a specific brief, either of those is a safe default.
Will a 4×3 inch badge fit a standard lanyard?
Yes, as long as the badge holder is designed for that size. Most horizontal badge holders with a top slot will take a 4×3 insert without any trimming. Just make sure the holder has either a pre-punched hole or that you use a slot punch before threading the lanyard. A badge reel works the same way.
Is a 4×6 inch badge too big for a conference?
Not necessarily. Trade shows and large expos use them regularly because they’re easy to read from across a booth. For a seated conference or dinner event, they can feel bulky. Size depends on context — if attendees are moving through a crowded exhibition floor, bigger is often better.
What DPI should I use for badge artwork?
300 DPI is the minimum for sharp print output. If your artwork includes a QR code, make sure the QR itself is vector or exported at 300 DPI minimum — a pixelated QR won’t scan. Most custom badge printers will tell you upfront if a file isn’t print-ready.
What font size works best for names on a badge?
At minimum, 24pt for names on a 4×3 badge. Job titles can drop to 16–18pt. For a larger 4×6 badge, you have room to go up to 72pt for the name, which works well for trade shows where visibility matters. Stick to Arial, Helvetica, or another clean sans-serif font — decorative fonts look fine on screen and fall apart in print.
Can I print badges at home instead of using a professional printer?
You can, but the quality gap is real. Home inkjet printers rarely hit consistent 300 DPI across a full badge run, and card stock feed issues are common. For small events under 20 people, it’s workable. Anything larger, use a dedicated custom badge printer or a print-on-demand service.
Are there standard sizes for virtual event badges?
There’s no fixed standard. Most platforms that generate virtual event badges — including Eventbrite — use a roughly 1:1 or 4:3 aspect ratio image, displayed as a profile-style card. 600x800px or 800x600px covers most use cases. For hybrid events, design the digital version first and adapt it for print rather than doing it the other way around.
What’s an A7 badge in inches?
A7 is 74x105mm, which converts to approximately 2.9×4.1 inches. It’s the closest metric equivalent to the US 4×3 format, though it’s slightly taller. Most A7 badge holders and lanyards sold in the UK will fit standard international badge templates with minimal adjustment.
Do eco-friendly badges come in standard sizes?
Yes. Recycled and biodegradable badges are available in all the common sizes — 4×3, A7, 4×6, and A6. The material differs (seed paper, kraft board, recycled PVC), but the dimensions match standard badge holders. You don’t need to redesign anything to go greener.
Where does the QR code go on a badge?
Bottom third of the badge is the most practical placement. It keeps the name and organisation readable at a glance, and the QR is still easy to scan when the badge is hanging from a lanyard. Make sure there’s enough white space around the QR — cramming it tight against text or the badge edge will cause scan failures.
Final Verdict — Which Conference Badge Size Should You Choose?
Here’s the short version: 4×3 inch (US) or A7/74x105mm (UK) covers the majority of events. If you’re unsure, start there.
But the right answer depends on three things you already know — your event type, your lanyard setup, and how much text you’re putting on the badge.
For Most Corporate Conferences and Trade Shows
Go with 4×3 inch or A7. Both fit standard badge holders and most lanyards without any modification. They give you enough room for a name in 72pt font, a job title in 24pt, and a company logo without it all feeling cramped. If you’re printing through a custom badge printer or uploading to a service like Eventbrite’s badge templates, these are the default dimensions for a reason.
Need to add a QR code? Still fine at this size. Keep the QR code at least 25mm square and print at 300 DPI minimum — anything lower and scanners struggle.
For Large Trade Shows With Heavy Foot Traffic
Step up to 4×6 inch or A6. The extra height means you can stack more information without shrinking the font below readable. At a crowded exhibition floor, no one’s leaning in to read a 14pt job title. Bigger badge, bigger type, faster connections.
These larger sizes also give you space for sponsor logos without they end up fighting for attention against the attendee’s name.
For Smaller Events, Workshops, or One-Day Meetups
The 4×3 inch is still fine. You don’t need A6 for a 40-person workshop. Smaller events usually mean closer proximity anyway — people can read a standard badge at arm’s length without trouble.
If you’re using badge reels instead of lanyards, double-check the slot punch position before you finalize your design. A badge reel clips to a slot at the top; if your design has critical content too close to the top edge, you’ll lose it.
The Font Rule Doesn’t Change Regardless of Size
Whatever size you pick — use Arial, Helvetica, or another sans-serif font. Names should never drop below 24pt, and if budget allows, push first names to 48–72pt. Readable at a glance. That’s the whole point.
One Last Practical Note
If you’re ordering recycled or biodegradable badges, confirm the finished size with your supplier before you lock in your print files. Some eco materials come in slightly non-standard dimensions and your badge holder might not fit them without adjustment. It’s a small thing that catches people out more often than it should.
Pick your size, set your resolution to 300 DPI, and don’t overthink the rest. The 4×3 inch badge has worked for decades. It’ll work for your event too.