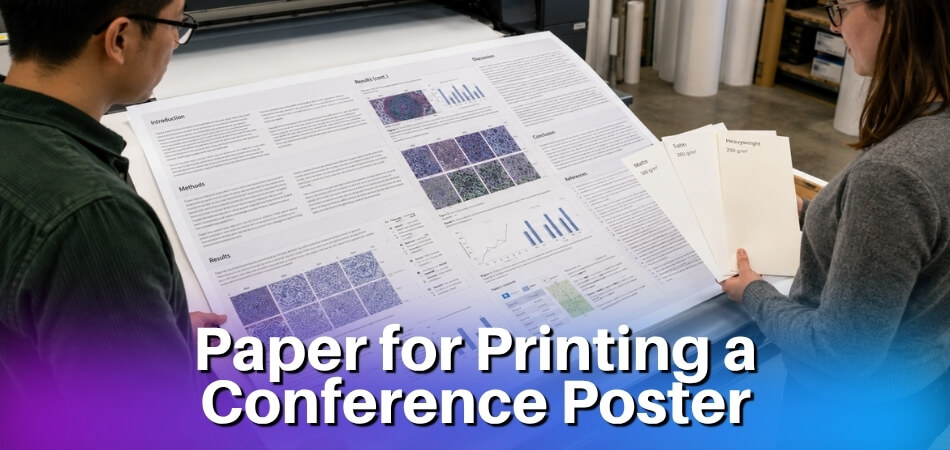
Your poster is designed, your research is solid — but printing on the wrong paper can undermine everything before a single person reads it. Choose a high-gloss stock under harsh fluorescent conference lighting and you’ll watch judges squint through the glare instead of reading your methodology. Pick something too thin and flimsy, and your poster arrives creased from the tube, looking like an afterthought next to the laminated panels beside it. Paper isn’t just a surface. It’s the first physical signal of how seriously you took the work.
For most academic conference posters, satin or matte photo paper at 200–260 GSM is the standard choice. Matte paper eliminates glare entirely, making it ideal under the fluorescent lighting common at research venues. Satin finish (sometimes called semi-gloss paper) balances color vibrancy with low reflection — a strong all-purpose pick. Glossy paper delivers punchy color saturation but causes significant glare indoors, so it’s rarely the right call. For posters that need to survive a carry-on flight or an outdoor session, polypropylene fabric poster material or vinyl banner material resists creasing and moisture far better than any paper stock. Whatever you choose, 200 GSM handles well and looks professional; 260 GSM feels noticeably more substantial and holds up better through the day.
The right paper also directly affects how your CMYK color profile translates from screen to print, how sharp your text reads at 300 DPI resolution, and whether the colors you built in Canva or exported from PowerPoint as an Adobe Acrobat PDF actually look the way you intended. Think of this guide as the advice you’d get from someone at the university print lab the night before your deadline — practical, specific, and honest about what’s worth the extra cost.
The Short Answer: Best Paper for Conference Posters at a Glance
For most academic conferences, satin finish paper at 200–260 GSM is the safest choice. It handles fluorescent lighting glare better than glossy paper, reproduces colors accurately, and doesn’t look flat like basic matte does. Print at 300 DPI, export from PowerPoint or Canva as an Adobe Acrobat PDF using a CMYK color profile (not sRGB), and you’re in good shape.
Going somewhere you need to travel light? A polypropylene fabric poster folds into your carry-on luggage without creasing. Heavier budget? Glossy paper or semi-gloss paper with UV coating makes colors pop for design-heavy research posters.
Quick reference:
- Indoor academic conference: Satin or matte photo paper, 200–260 GSM
- Travel-friendly: Polypropylene fabric poster
- High-impact visuals: Glossy or semi-gloss with lamination
- Tight budget: University print lab or Staples Print and Marketing on standard large-format stock
That covers 90% of situations.
Paper Types Explained — Matte, Glossy, Satin, and Fabric
Matte Photo Paper — Glare-Free Presentation Under Indoor Conference Lighting
Matte photo paper is the default choice for most academic conferences, and for good reason. Conference halls are almost always lit with fluorescent lighting, and that kind of overhead light bounces hard off shiny surfaces. A glossy poster under those conditions makes people tilt their heads sideways just to read your data.
Matte photo paper eliminates that problem entirely.
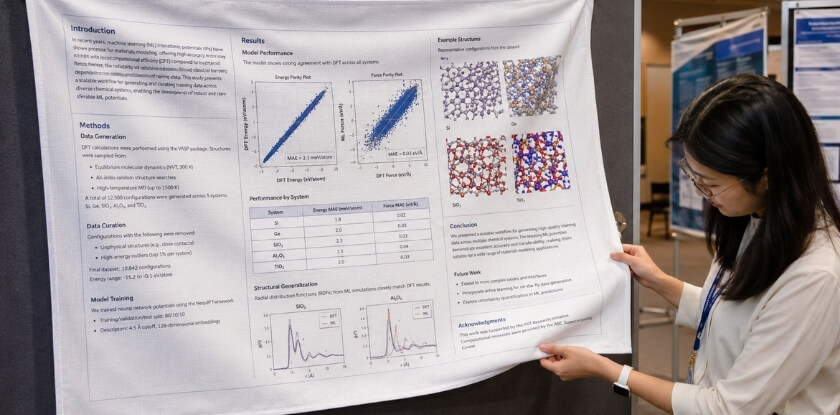
The tradeoff is that colors look slightly less punchy than they do on glossy stock. Not dramatically so — just a bit more subdued. If your poster is heavy on data tables, text blocks, and simple charts, you won’t notice the difference. If you’ve got a full-bleed microscopy image or a satellite photo taking up half the layout, you might.
For weight, aim for 200 GSM to 260 GSM. Lighter than that and the poster feels flimsy, especially at 36×48 inches. Most large-format printing services at FedEx Office and Staples Print and Marketing default to something in this range when you select matte photo paper — but it’s worth asking specifically, because “matte” can mean anything from a lightweight 170 GSM to a solid 260 GSM depending on their current stock.
Print at 300 DPI. No exceptions. Anything lower and you’ll see pixelation in fine-detail images when someone leans in close.
Glossy Paper — Vibrant Colors With a Real Tradeoff
Glossy paper makes colors pop. CMYK outputs on a high-gloss surface look noticeably richer than the same file printed on matte stock — reds are deeper, blues are more saturated, and photographic images look genuinely impressive.
The problem is fluorescent lighting glare. It’s not subtle. Attendees end up reading your poster at an awkward angle, or they skip it entirely rather than bother. That’s a real cost at a research poster session where you have maybe 90 seconds to hook someone walking by.
Some people add UV coating or lamination on top of glossy paper, which reduces glare and adds durability. It works, but it adds cost and turnaround time, and you’re still not getting the same flat readability as a proper matte surface.
Glossy paper makes sense if your venue has controlled, directional lighting — a gallery-style space or a well-lit exhibit hall with track lighting rather than fluorescent banks overhead. If you don’t know the venue setup in advance, matte is the safer bet.
One other thing: glossy surfaces fingerprint badly. After three hours of people pointing at your poster, it’ll show it.
Satin and Semi-Gloss Finish — The Best of Both Worlds
Satin finish paper sits between matte and glossy. Semi-gloss paper is essentially the same category — the naming varies by print vendor, but the material properties are nearly identical. You get better color reproduction than matte without the mirror-like glare of full glossy.
Under fluorescent lighting, satin holds up well. There’s a slight sheen, but it doesn’t create the same blinding reflection you’d get from glossy stock. Most people looking at a satin-printed poster don’t even register the finish — they just see a clean, sharp image.
This is the option a lot of experienced conference presenters land on after getting burned by glossy once or twice. The color rendering at 260 GSM satin is noticeably better than matte for image-heavy posters, and it still reads cleanly from three feet away under overhead lights.
FedEx Office and Staples both carry satin finish as a standard option. If you’re using a university print lab, ask whether they have satin photo paper loaded — some do, some only stock matte.
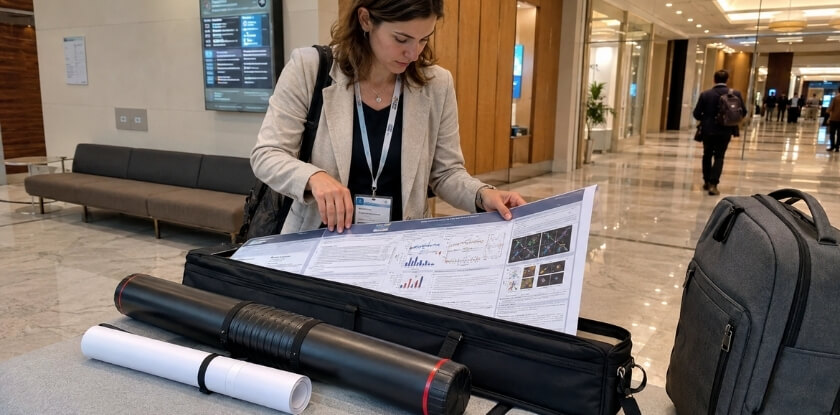
Fabric and Polypropylene — Travel-Friendly and Crease-Resistant Options
If you’re flying to an academic conference, getting a 48-inch poster tube through airport security is its own ordeal. It won’t fit in carry-on luggage. You’re checking it or shipping it ahead, and both involve real risk of it arriving damaged or not arriving at all.
Fabric and polypropylene posters solve this.
A polypropylene fabric poster folds without creasing permanently. You can stuff it into your carry-on, pull it out at the venue, hang it up, and it smooths out within minutes. Spoonflower fabric printing is one option for this, though turnaround times are longer than a standard print shop. Some large-format print services have started offering fabric poster printing specifically for this use case.
Vinyl banner material is another option — it’s durable, water-resistant, and reusable. The downside is weight. A full-size vinyl poster is heavier than fabric and doesn’t fold as cleanly.
Color reproduction on fabric is good but not quite as sharp as photo paper at 300 DPI. Fine text — anything under 18pt — can look slightly soft. For a data-heavy research poster with dense figure labels, test a small section before printing the full size.
The practical reality: if you present at multiple conferences per year, a fabric poster pays for itself in avoided shipping costs and stress pretty quickly.
How Much Does Paper Weight (GSM) Matter — Why 200–260 GSM Is the Conference Standard
GSM — grams per square meter — is the standard measurement for paper thickness and weight. The higher the number, the heavier and more rigid the sheet. For a conference poster, this matters more than most people expect.
A 90 GSM sheet is basically office paper. Print a 36×48 inch poster on that and it’ll sag, crease the moment you unfold it, and look cheap pinned to a foam board. Nobody reads a floppy poster.
The 200–260 GSM Sweet Spot
Most professional large-format printing services — including Staples Print and Marketing and FedEx Office — default to somewhere in the 200–260 GSM range for poster prints, and there’s a practical reason for that.
200 GSM is the lower end of what works. It holds its shape reasonably well, ships flat without permanent creasing, and costs less per print. Fine for a student poster or a low-stakes departmental presentation.
260 GSM is where most academic conference posters land. It’s noticeably stiffer, drapes better if you’re hanging it without a backing board, and survives being rolled, stuffed in a poster tube, and carried through an airport without looking destroyed. Matte photo paper and satin finish stocks at this weight feel genuinely professional.
Go above 260 GSM and you start running into real transport problems. Thicker stock resists rolling, which makes fitting the poster into a standard poster tube difficult. If you’re packing a carry-on for a conference, that’s a headache you don’t need.
Weight Interacts With Finish
This is where people make mistakes. A 260 GSM matte photo paper performs completely differently than a 260 GSM glossy paper under the same conditions. Glossy at high weights can crack along fold lines. Matte at the same weight is more forgiving.
If your venue has heavy fluorescent lighting — which most conference halls do — a heavier matte or satin finish stock at 200–260 GSM is the practical call. Glossy paper at any weight creates glare that makes sections of your research poster genuinely hard to read from a normal viewing distance.
Fabric and Vinyl Are a Different Category
Polypropylene fabric poster material and vinyl banner material don’t use the GSM scale the same way. They’re measured differently and behave differently — fabric folds without creasing, vinyl is more rigid and heavier. If you’re printing through Spoonflower fabric printing or a banner supplier, ask specifically about the material spec rather than assuming a GSM number translates.
One Quick Rule
If someone at your university print lab asks what weight you want and you’re not sure, say 200–260 GSM on matte or satin stock. That answer is correct for almost every standard academic conference situation.
Indoor vs Outdoor Conference Posters — Why Your Paper Choice Should Be Different
Most academic conference posters live indoors — hotel ballrooms, convention centers, university lecture halls. But the conditions inside those venues vary more than you’d think, and outdoor poster situations exist too (think science fairs, open campus events, or covered outdoor pavilions). The paper you pick needs to match where the poster actually hangs, not just what looks good on screen.
Indoor Academic Conferences
This is the standard case — fluorescent lighting, climate-controlled rooms, people standing about two feet from your poster reading your methodology section.
Matte photo paper wins here. Fluorescent lighting glare is a real problem with glossy surfaces. A high-gloss poster under harsh overhead lights will create hot spots that make text genuinely hard to read. Matte absorbs that light instead of bouncing it back at your audience. Satin finish is a reasonable middle ground if you want slightly richer color reproduction without the full glare issue.
For weight, 200 GSM to 260 GSM is the range that looks professional mounted on a foam board or hung from a clip system. Anything lighter than 170 GSM tends to curl at the edges if the room has any air circulation from HVAC vents — and most conference rooms do.
Print at 300 DPI resolution and export from PowerPoint, Canva, or Adobe Acrobat PDF export using a CMYK color profile. RGB and sRGB look fine on your monitor. Under fluorescent conference lighting, colors can shift in ways that catch you off guard if the file wasn’t converted before printing.
University print labs and services like Staples Print and Marketing or FedEx Office handle large-format printing on matte or satin stock routinely. If you’re a student, ask specifically about student discount printing — some university print labs offer it without advertising it loudly.
Outdoor and Semi-Outdoor Settings
Rain, humidity, direct sun, and wind change everything. Standard photo paper — even 260 GSM matte — will warp, fade, or disintegrate outdoors within hours if it gets any moisture exposure.
For outdoor use, polypropylene fabric poster material or vinyl banner material is the practical answer. Neither absorbs water. Vinyl is slightly more rigid and handles wind poorly without grommets; fabric drapes better and folds down for storage. Spoonflower fabric printing is one option if you want a softer textile feel, though turnaround times can vary.
If you’re going outdoors and still want a paper-based option for some reason, UV coating or lamination adds meaningful protection against moisture and light fade. Not permanent protection — but enough for a single-day outdoor event. Semi-gloss paper with lamination holds up better than matte under those conditions because the laminate bonds more evenly to the smoother surface.
The Travel Factor
This is separate from the indoor/outdoor question but closely related to paper choice. If you’re flying to a conference and need to pack your poster, a polypropylene fabric poster rolls tightly and fits inside a poster tube that slides into carry-on luggage. Standard photo paper at 260 GSM is stiff enough that rolling it too tightly causes crease marks that don’t fully flatten out before your session.
If you’re driving or checking luggage, paper is fine. If you’re flying and gate-checking feels risky, fabric is worth the slight extra cost. Either way, having a QR code handout as a backup isn’t a bad call — if something happens to the poster in transit, you still have something to hand people at the session.
Professional Large-Format Printing vs DIY Home Printing — Which Is Right for You
Most people printing a conference poster fall into one of two camps: they either send it to a print shop and hope for the best, or they try to print it at home and end up disappointed at 11pm the night before the conference. Knowing which route fits your situation saves both money and stress.
Professional Large-Format Printing — When It Is Worth It
For anything 24×36 inches or larger, professional large-format printing is almost always the right call. Home printers simply can’t handle that size. Full stop.
Services like Staples Print and Marketing and FedEx Office are the most accessible options. You can upload a PDF directly from Adobe Acrobat PDF export, walk in, and pick up a finished poster the same day in many locations. Turnaround time matters — check this before you commit to a vendor.
A few things worth knowing before you hit “order”:
- File format matters. Send a PDF exported at 300 DPI resolution and set to CMYK color profile. If your file is in RGB or sRGB (which is the default in Canva and PowerPoint), colors can shift noticeably when printed — particularly reds and oranges. Some print shops will auto-convert; others won’t warn you.
- Paper stock selection. A good print shop gives you actual choices — matte photo paper, satin finish, semi-gloss paper, or even polypropylene fabric poster stock. If the shop only offers one option with no GSM listed, ask before you pay.
- GSM options vary by vendor. FedEx Office typically offers poster paper in the 200 GSM to 260 GSM range depending on the stock you pick. Ask specifically — “standard” poster paper and “photo paper” are different products at different price points.
- Student discount printing is real and worth asking about. Many university print labs offer large-format printing at a fraction of commercial rates — sometimes as low as $5–$10 for a standard academic conference poster. If you’re at a university, check there first before going to a commercial shop.
Specialty options exist too. Spoonflower fabric printing produces textile-based posters that fold without creasing and fit in a carry-on bag or even checked luggage without a poster tube. It’s not cheap — expect $30–$60 for a 36×48 poster — but for frequent conference travelers, it pays for itself fast.
One more thing: if your conference venue uses heavy fluorescent lighting, ask the print shop about a matte finish or UV coating to cut down on glare. Glossy prints under fluorescent tubes can make your text genuinely hard to read from three feet away.
Home Printing — When It Works and When It Falls Short
Home printing works for a narrow use case: smaller posters, roughly A1 size or below, where you have a decent inkjet printer and quality paper. That’s about it.
If you have a wide-format inkjet at home — an Epson EcoTank or a Canon PIXMA Pro series, for example — you can print a respectable research poster on matte photo paper at 200 GSM with good results. Run a test print at 25% scale first to check colors before you commit a full sheet.
Where home printing consistently falls short:
- Color accuracy. Consumer inkjet printers aren’t calibrated for accurate CMYK output. What looks great on screen in Canva or PowerPoint may print muddy or oversaturated. If you’re going the home route, calibrate your monitor or at minimum do a small test print.
- Paper feeding issues. Thick paper — anything above 200 GSM — jams frequently in standard home printers not designed for heavy stock.
- Maximum print width. Most home printers top out at 8.5 or 13 inches wide. That’s fine for handouts or a QR code handout to accompany your poster, but not for the poster itself.
- Seams. Tiling a large poster across multiple A4 or letter sheets and taping them together looks unprofessional at an academic conference. It happens, and people do it in a pinch, but it’s not a great first impression.
Bottom line: use a professional print shop for the actual poster. Use your home printer for supplementary materials — QR code sheets, abstract handouts, backup copies of your contact info. That’s where it genuinely earns its place.
Budget-Friendly Printing Options and Where to Find Student Discounts
Printing a conference poster doesn’t have to cost you $150. Prices vary wildly depending on where you go, what paper you choose, and whether you qualify for any discounts — and plenty of people overpay simply because they didn’t look around first.
Start With Your University Print Lab
This is the obvious first stop, and it’s worth taking seriously. Most university print labs offer large-format printing at rates that commercial shops can’t touch — sometimes as low as $15–$30 for a 36×48 inch poster on decent matte photo paper or satin finish stock. The quality is usually solid for academic conference use.
Some labs also stock heavier paper in the 200 GSM to 260 GSM range, which is exactly what you want for a poster that needs to hang flat and look professional. Ask specifically about paper weight before you submit your file. Don’t assume.
If your department has a research account, your poster might even be covered entirely. It’s worth a five-minute conversation with the department administrator before you spend anything out of pocket.
Staples and FedEx Office — Know the Tricks
Both Staples Print and Marketing and FedEx Office can print a conference poster same-day or next-day. That’s useful when you’re cutting it close before a conference.
Standard pricing at these chains runs roughly $60–$100 for a large-format poster depending on size and paper type. Glossy paper tends to cost slightly more than matte. Semi-gloss paper usually falls in between.
A few things that actually save money here:
- Order online, pick up in store. Both Staples and FedEx Office frequently run online-only discounts of 20–40% off print orders. The in-store walk-up price is almost always higher.
- Use a student email. FedEx Office has offered student discount programs tied to educational email verification. Check their site before ordering — these promotions change, but they do exist.
- Print on matte rather than glossy. Beyond the cost saving, matte photo paper handles fluorescent lighting glare far better at indoor academic conferences, which is a practical win on top of the budget one.
Also, if you’re printing at 300 DPI resolution and exporting from Canva, PowerPoint, or Adobe Acrobat PDF export, make sure your file is in CMYK color profile rather than RGB or sRGB. FedEx Office and Staples both print in CMYK, and an unconverted file can shift your colors noticeably — blues go dull, reds go orange. Fix it before you upload.
Online Print Services for the Best Per-Print Price
If you have five or more days before your conference, online large-format printers are usually the cheapest option per square foot. Services like GotPrint, PrintingForLess, and similar vendors often undercut local shops significantly, especially on heavier paper stocks.
The tradeoff is shipping time and the inability to check a physical proof before it arrives. Order early. And always request a PDF proof confirmation before they go to print.
For fabric posters — which travel better than paper since they fold without creasing and fit in carry-on luggage without a poster tube — Spoonflower fabric printing is a popular option among conference attendees who travel frequently. A polypropylene fabric poster won’t wrinkle, and it’s surprisingly affordable when you factor in that you’re skipping the cost of a poster tube and checked baggage fees.
What to Skip If You’re on a Tight Budget
UV coating and lamination add cost and, for a one-day academic conference, they add essentially zero value. Skip them unless you’re reusing the poster at multiple events.
Vinyl banner material is overkill for indoor conference use and usually more expensive than paper alternatives. It’s designed for outdoor signage. Unless you’re presenting outside or in a high-humidity environment, standard large-format paper on satin or matte finish is the right call.
The QR Code Workaround for Handouts
If your print budget is tight, don’t cut corners on the poster itself to afford printed handouts. Print your poster at full quality. Then use a QR code handout — a simple half-sheet with your name, research title, and a QR code linking to your PDF or supplementary data. Print those at home on regular paper. It costs almost nothing, and honestly, attendees are more likely to scan a QR code than carry a full paper handout out of the venue.
Canva makes QR code generation straightforward, and most smartphones read them without a dedicated app now. It’s a practical solution, not a compromise.
Poster Tubes, Carry-On Travel, and Transport — How Your Material Choice Affects Portability
Here’s something a lot of first-time conference presenters don’t think about until they’re standing at the airport: how you’re getting your poster there matters as much as how it looks on the wall.
Paper Posters and the Poster Tube Problem
Standard paper prints — whether matte photo paper, satin finish, or glossy paper — need to be rolled and stored in a poster tube. That’s fine for driving to a local venue. It gets annoying fast when you’re flying.
A poster tube typically won’t fit in carry-on luggage. It either gets gate-checked or goes in the overhead as an awkward oversized item. Some airlines charge extra. Others lose it. Neither is great when you’re presenting tomorrow morning.
The bigger issue is rolling. Paper at 200 GSM or 260 GSM holds a curl after being in a tube for several hours. You’ll be fighting the edges when you try to mount it. Bringing binder clips or foam mounting tape helps, but it’s an extra step most people forget until they’re in the conference hall.
Fabric Posters Are Built for Travel
A polypropylene fabric poster completely sidesteps the tube problem. Fabric posters fold flat. They fit inside a folder, a portfolio sleeve, or just tucked into your carry-on luggage between a laptop and a change of clothes. No tube required.
Spoonflower fabric printing and several large-format printing services now offer fabric options that fold without permanent crease lines. When you unfold and hang the poster, minor wrinkles usually drop out within an hour at room temperature. Not always — but usually.
This is the single biggest practical reason fabric has gained traction at academic conferences over the last several years. The research poster itself hasn’t changed. The shipping logistics have.
Vinyl Is Durable but Awkward to Move
Vinyl banner material is tough. It handles outdoor conditions well, resists moisture, and doesn’t tear easily. But it’s heavy. Rolling a large vinyl print and getting it into a poster tube is manageable, but the material doesn’t compress, and the tube adds real weight to your luggage.
For most indoor academic conference scenarios, vinyl is overkill. It makes more sense for trade shows or outdoor events where durability genuinely matters.
Printing on Arrival — A Practical Alternative
If you’re flying to a conference, printing on arrival is worth considering. Staples Print and Marketing and FedEx Office locations are in most mid-to-large cities, and turnaround on a same-day large-format print is usually a few hours if you book ahead online.
You send your file — ideally exported from Canva, PowerPoint, or as an Adobe Acrobat PDF export with the CMYK color profile set correctly — and pick it up after you land. No tube, no checked baggage fees, no crumpled corners.
The catch: confirm your file specs before you travel. Make sure your design is set to 300 DPI resolution at the final print size. CMYK is safer than RGB or sRGB for avoiding color shift at the print shop. Getting a color surprise when you’re 900 miles from your office is not a good time.
A Quick Checklist Before You Travel With a Poster
- Fabric poster? Fold it, pack it flat, done.
- Paper poster in a tube? Measure the tube against your airline’s carry-on policy before you go.
- Printing on arrival? Confirm the file is 300 DPI, PDF format, CMYK — and call the print shop to verify stock availability.
- Bringing a QR code handout instead of physical copies? Print those at the university print lab before you leave. Much easier.
The material you choose has a direct line to how stressful your travel day is. Fabric is the low-friction option. Paper is cheaper but needs more planning. Either works — just make that decision before you’re at the gate.
File Preparation Tips — Exporting from PowerPoint to PDF and Getting Your Color Profile Right
Getting your file ready is where a lot of posters quietly go wrong. You can pick the perfect satin finish paper, pay for professional large-format printing, and still end up with a muddy, undersaturated print — all because of how you exported your file.
Export as PDF, Not as a .pptx
Send your poster to the print shop as a PDF. Always. A .pptx file depends on fonts and assets that may not transfer cleanly to another machine. Adobe Acrobat PDF export locks everything in place — fonts, image positions, embedded graphics, all of it.
In PowerPoint, go to File → Save As → PDF. Before you click save, hit Options and make sure “ISO 19005-1 compliant (PDF/A)” is checked if your print shop requests archival format. Some university print labs specifically ask for PDF/A. When in doubt, ask before you submit.
One more thing: check your slide dimensions before you design anything. If you start with a default 10×7.5 inch slide and your poster needs to be 36×48 inches, PowerPoint will scale it — and that scaling can introduce blurriness and layout shifts. Set the exact final dimensions at the start via Design → Slide Size → Custom Slide Size.
Resolution: 300 DPI Is the Floor, Not the Target
For large-format printing, 300 DPI resolution at the actual print size is the minimum. This trips people up because PowerPoint doesn’t directly show you DPI — it works in inches and pixels.
If your poster is 36×48 inches at 300 DPI, that’s 10,800×14,400 pixels. Any images you drop into your design need to hold up at that size. A stock image that looks fine on screen at 96 DPI will print as a blurry mess at 36 inches wide.
Canva handles this better than most people expect — when you export at high resolution (the paid plan lets you export at 300 DPI directly), the output is clean. PowerPoint’s PDF export is fine for vector elements like text and shapes, but raster images embedded in your slides are capped by their original resolution. Use high-resolution source images.
RGB vs CMYK — Know Which One Your Printer Uses
This is the one that surprises people most. Screens display color in RGB (red, green, blue). Printers use CMYK (cyan, magenta, yellow, black). PowerPoint and Canva work entirely in RGB. Most professional large-format printers, including machines used at Staples Print and Marketing and FedEx Office, accept RGB files and handle the conversion internally.
The problem is that the conversion isn’t always predictable. Bright blues, vivid reds, and neon colors in RGB often shift when converted to CMYK — sometimes dramatically. If your poster has a deep navy background or a bright accent color that matters for your branding, do a small test print first. A single A4 or letter-size proof from a local print shop costs almost nothing and saves you from a $60 reprint surprise.
If you’re working in Adobe Illustrator or Photoshop, you can convert to CMYK manually before export and soft-proof the colors. For PowerPoint users, you don’t have that option natively — but you can export to PDF via Adobe Acrobat PDF export and use Acrobat’s preflight tools to check the color space. Stick with sRGB as your working color profile in PowerPoint; it’s the most standardized RGB variant and tends to convert most predictably.
Fonts, Bleeds, and a Few Other Things Print Shops Will Thank You For
Embed your fonts. When exporting to PDF from PowerPoint, fonts are embedded by default — just don’t use unusual fonts stored only on your local machine without checking.
If your design has color going edge-to-edge, ask your print shop about bleed requirements. Most want 0.125 inches of bleed on each side. PowerPoint doesn’t have a native bleed setting, so you’ll need to extend your background slightly beyond the poster boundary manually.
Name your file clearly. Something like SmithLab_ConferencePoster_36x48_300dpi_FINAL.pdf takes three seconds to type and makes it obvious to the person handling your job exactly what they’re working with. Print shops deal with dozens of files. A clear filename doesn’t get mixed up.
And if you’re presenting at an academic conference and attaching a QR code to your poster linking to a handout or supplementary data, export that QR code as an SVG or high-resolution PNG — not a screenshot from your phone. It needs to scan cleanly even when printed at several inches across.
Poster Handout Alternatives — Physical Handouts vs Digital QR Codes
Your poster goes up on a board for maybe six hours. People walk past, glance at it for thirty seconds, and move on. If you want them to actually remember your research, you need something they can take with them.
The two real options are printed handouts and QR codes. Both work. Which one you choose depends on your budget, how much you’re traveling, and how tech-comfortable your audience is.
Printed Handouts — Still Worth It
A small stack of A4 or letter-sized printouts with your key findings, a chart or two, and your contact details does the job well. Don’t try to miniaturize your entire poster onto one page. Pull out the headline result, the method in one sentence, and a way to reach you.
Print these on standard 80–90 GSM office paper. You’re not trying to impress anyone with the handout itself — you’re just giving people something to shove in a bag and read later. If you want to go slightly nicer, a semi-gloss paper at around 150 GSM runs cheap at Staples Print and Marketing or FedEx Office and looks noticeably more polished without costing much.
Bring around 30–50 copies for a mid-sized academic conference. You’ll almost certainly have leftovers, but running out in the first hour is frustrating.
One practical note: handouts add weight and bulk. If you’re already managing a poster tube in carry-on luggage, a fat stack of paper is one more thing to deal with. Print on-site when possible.
QR Codes — Fast, Free, and Surprisingly Effective
A QR code pointing to a PDF of your research poster (or a full paper, a lab website, anything relevant) costs you nothing to produce and nothing to carry.
Generate one through any free QR code tool, drop it into your poster design in Canva or PowerPoint, and make sure it’s large enough to scan easily — at least 1.5 inches square on the printed poster. Export the final file using Adobe Acrobat PDF export at 300 DPI resolution so the QR code itself prints cleanly. A blurry QR code printed at low DPI won’t scan.
Point the QR code somewhere mobile-friendly. A raw PDF hosted on Google Drive works fine. A clean landing page is better.
The one real problem with QR codes at conferences is fluorescent lighting glare off glossy poster surfaces — it makes phones struggle to lock onto the code. If you’re printing on glossy paper, position the QR code in an area with minimal shine, or switch to matte photo paper which eliminates that entirely.
Combining Both
Honestly, the best setup is a small QR code handout — a business-card-sized or half-sheet card printed on 200 GSM stock with just the QR code, your name, and the poster title. It’s tiny, it’s lightweight, and it gives people a physical object that leads them to your full content digitally.
Some university print labs will do a short run of these cards cheaply. If you qualify for student discount printing, the total cost is almost nothing.
Don’t overthink this part. Your poster is the centerpiece. The handout or QR code is just a bridge to keep the conversation going after you’ve walked away from the board.
FAQ
What is the best paper for printing a conference poster?
Satin or semi-gloss paper at 200–260 GSM is the go-to choice for most academic conferences. It handles color well, resists minor handling, and doesn’t throw glare the way full glossy paper does under fluorescent lighting. If you’re presenting in a bright exhibition hall, matte photo paper is safer.
Can I print a conference poster at home?
Technically yes, but home printers can’t handle large-format printing. A standard inkjet tops out at A4 or A3. For anything A0 or 36×48 inches, you need a print service — Staples Print and Marketing, FedEx Office, or your university print lab are the practical options.
What DPI should a conference poster be?
300 DPI at the final print size. If you’re designing in Canva or PowerPoint, set your canvas to the exact poster dimensions from the start. Scaling up a low-resolution file later won’t fix it.
Does paper weight actually matter?
Yes. Below 170 GSM, posters curl, crease easily, and look cheap on a board. The 200–260 GSM range gives you something that hangs flat and holds up through a day of people leaning in to read it.
Should I use matte or glossy paper for a conference poster?
Depends on the room. Glossy paper and full gloss finishes cause reflections under fluorescent lighting — which is most conference venues. Matte photo paper solves that. Satin finish is a good middle ground if you want richer colors without the glare problem.
What color profile should I use when exporting my poster?
Export as CMYK if your print service accepts it — that’s what commercial printers use. Some services want sRGB or RGB color profile files. Check before you export. Doing an Adobe Acrobat PDF export from your final file is the safest format to send regardless.
Can I print on fabric instead of paper?
Yes. A polypropylene fabric poster is lighter, doesn’t crease, and rolls up without damage. Spoonflower fabric printing is one option if you want a softer, textile-feel finish. Fabric works well for repeat conferences where you’re shipping or traveling with the same poster multiple times.
Will my poster fit in carry-on luggage?
A paper poster rolled in a poster tube usually fits in the overhead bin. Fabric posters roll smaller and are more forgiving. Vinyl banner material is heavier and bulkier — fine for driving to a local conference, awkward to fly with.
Where can I get student discounts on poster printing?
Start with your university print lab — many offer subsidized rates for academic conference submissions. FedEx Office and Staples Print and Marketing both have periodic discount codes, and student ID discounts are sometimes available in-store. It’s worth calling ahead.
Should I add lamination or UV coating to my poster?
For a single-use academic conference, no. Lamination and UV coating add cost and don’t change how the poster presents in a typical indoor setting. If you’re reusing the same poster across multiple events, lamination protects it from handling damage and light moisture.
What file format should I send to the printer?
PDF. Export from PowerPoint using the “print quality” setting, or use Adobe Acrobat PDF export if you’re working in another application. Send the printer a PDF at 300 DPI resolution with bleed marks if required. Avoid sending editable files — formatting shifts between software versions.
Do I need a QR code on my poster?
Not required, but useful. A QR code linking to your paper, dataset, or a digital handout saves you from printing dozens of physical copies. Pair it with a small stack of QR code handouts for people who want something physical to take away.
Final Verdict — Which Paper Should You Choose for Your Conference
The honest answer is that most academic researchers presenting at an indoor conference will be completely fine with satin finish paper at 200–260 GSM, printed large-format at a shop like FedEx Office or Staples Print and Marketing. That covers maybe 80% of use cases right there.
But let’s break it down by situation, because the “best” paper really does depend on what you’re walking into.
If You’re Presenting at a Standard Academic Conference Indoors
Go satin or matte. Fluorescent lighting glare is a real problem in hotel ballrooms and convention centers — glossy paper under those lights can make your text genuinely hard to read from two feet away. Satin gives you decent color depth without the mirror effect. Matte is slightly flatter in color but the safest choice for readability.
Weight-wise, 200 GSM is the floor. It handles rolling into a poster tube without cracking, survives a regrade at the print shop if something goes wrong, and looks professional on the board. If your print lab offers 260 GSM, it’s worth the small upcharge — the poster lies flatter when pinned and feels noticeably more substantial.
If Your Poster Has a Lot of Data Visualizations or Photography
Consider semi-gloss or a light satin finish instead of full matte. Graphs, microscopy images, and high-resolution photography printed on flat matte paper can look dull compared to what you see on screen. Print a small test section first if your university print lab allows it. Always export at 300 DPI and use a CMYK color profile — images designed in RGB or sRGB on screen will shift color when printed, sometimes dramatically.
If You’re Flying and Space Is Tight
Skip standard paper entirely and look at polypropylene fabric poster printing through a service like Spoonflower fabric printing or a local large-format shop that offers fabric output. Fabric folds without crease lines, fits in a carry-on luggage without a poster tube, and doesn’t wrinkle badly once hung. It won’t win any awards for color vibrancy, but it’s genuinely practical for long-haul travel.
If You’re on a Tight Budget
Print on 200 GSM matte photo paper at your university print lab. Look for student discount printing deals — many campus print services undercut commercial shops by 30–40%. Don’t waste money on UV coating or lamination for a single-use conference poster. That’s for trade show displays, not a research poster you’ll carry once and probably recycle.
If You’re Going Outdoors or to a Vendor Expo
That’s when vinyl banner material earns its place. Standard photo paper outdoors is useless — humidity alone will destroy it within a few hours. Vinyl holds up, can be weighted or grommeted, and large-format printing services handle it routinely.
One last thing. Whatever paper you choose, make sure your file is exported as an Adobe Acrobat PDF with fonts embedded and colors set to CMYK before you hand it to the printer. A perfect paper choice won’t save a poster that prints with font substitutions or washed-out colors because the file was sent as an RGB PNG at 72 DPI.
Pick the paper that fits your venue, your budget, and your travel situation. Then get the file right. That’s the whole job.